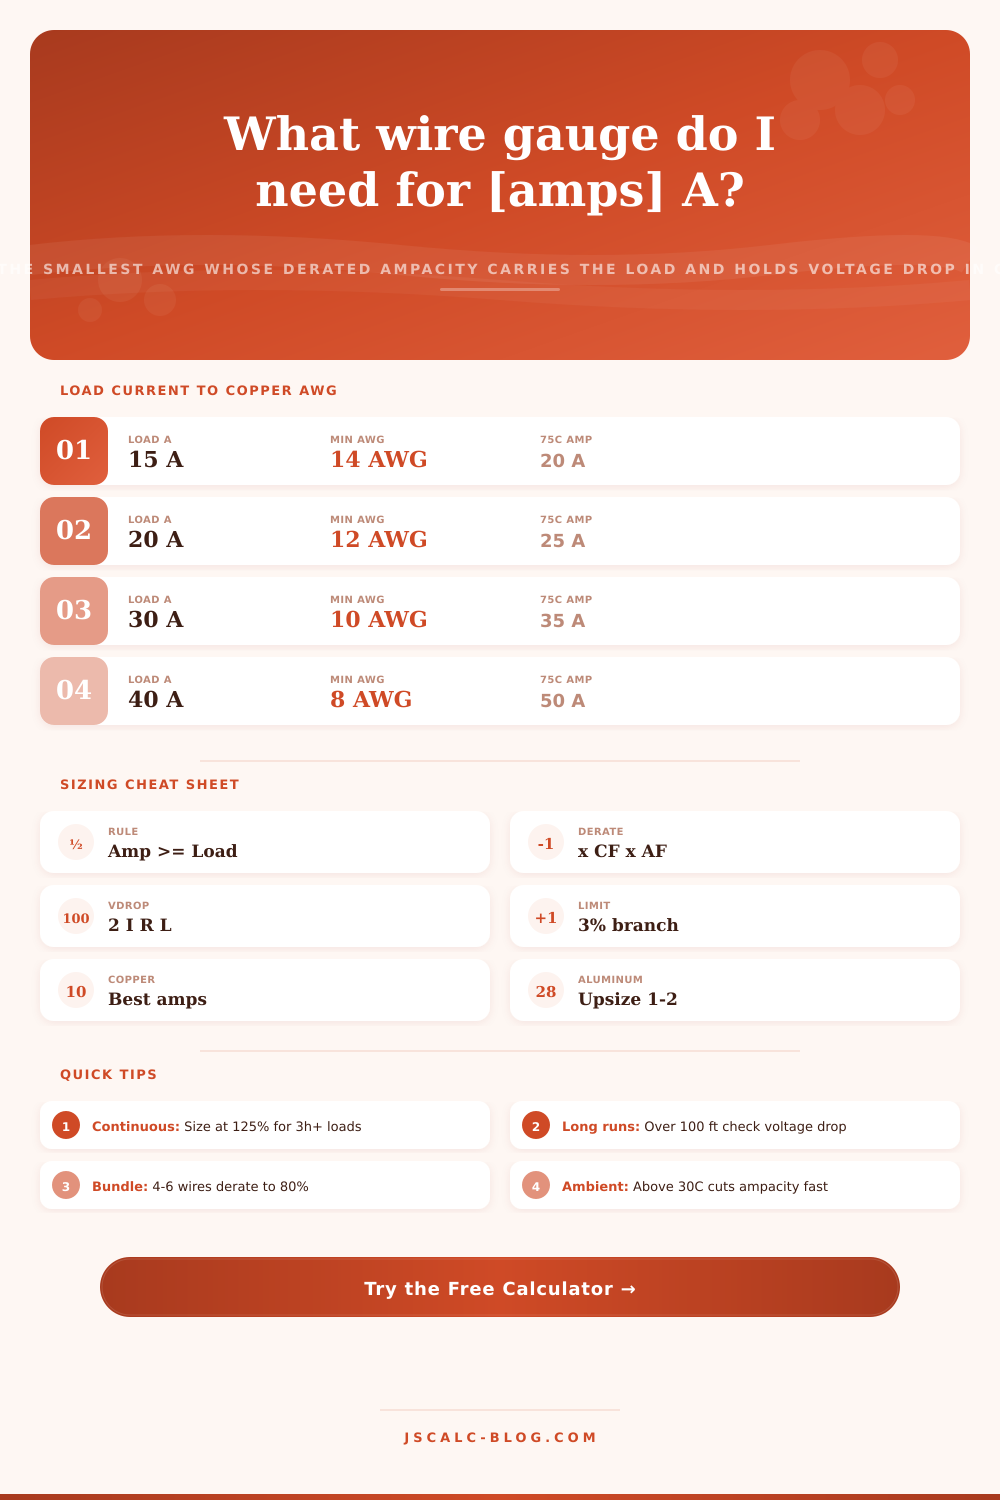
Wire Gauge From Current Calculator
Enter the load current in amps and the calculator selects the smallest adequate copper or aluminum AWG. It applies the ampacity table for your insulation temperature rating, corrects for ambient heat and conductor bundling, then checks voltage drop over your run length and upsizes the gauge if the drop is too high.
⚡Real Circuit Presets
📝Load and Install Conditions
The running current the circuit must carry, in amps.
Continuous loads use a 1.25 sizing factor per code.
Aluminum carries fewer amps and needs upsizing.
Terminals on breakers are often rated 75°C.
Air temp around the wire. 30°C is the base value.
Bundled conductors in one raceway lose ampacity.
Nominal circuit voltage, used for voltage drop.
Distance from source to load, one direction only.
Upsizes the gauge when drop exceeds this limit.
Sets the voltage-drop multiplier (2 or 1.732).
🔢Sizing Logic Snapshot
📋Copper Ampacity vs Temperature Rating
| AWG (Cu) | 60°C Amps | 75°C Amps | 90°C Amps | Ohms / 1000 ft |
|---|---|---|---|---|
| 14 | 15 | 20 | 25 | 3.140 |
| 12 | 20 | 25 | 30 | 1.980 |
| 10 | 30 | 35 | 40 | 1.240 |
| 8 | 40 | 50 | 55 | 0.778 |
| 6 | 55 | 65 | 75 | 0.491 |
| 4 | 70 | 85 | 95 | 0.308 |
| 3 | 85 | 100 | 110 | 0.245 |
| 2 | 95 | 115 | 130 | 0.194 |
| 1 | 110 | 130 | 150 | 0.154 |
| 1/0 | 125 | 150 | 170 | 0.122 |
| 2/0 | 145 | 175 | 195 | 0.0967 |
| 3/0 | 165 | 200 | 225 | 0.0766 |
| 4/0 | 195 | 230 | 260 | 0.0608 |
🔥Ambient Temperature Correction Factors
| Ambient (°C) | 60°C Rated | 75°C Rated | 90°C Rated |
|---|---|---|---|
| 21 to 25 | 1.08 | 1.05 | 1.04 |
| 26 to 30 | 1.00 | 1.00 | 1.00 |
| 31 to 35 | 0.91 | 0.94 | 0.96 |
| 36 to 40 | 0.82 | 0.88 | 0.91 |
| 41 to 45 | 0.71 | 0.82 | 0.87 |
| 46 to 50 | 0.58 | 0.75 | 0.82 |
| 51 to 55 | 0.41 | 0.67 | 0.76 |
| 56 to 60 | 0.00 | 0.58 | 0.71 |
📊Conductor Bundling Adjustment
| Conductors | Adjust Factor | Percent Kept | Typical Use |
|---|---|---|---|
| 1 to 3 | 1.00 | 100% | Single branch circuit |
| 4 to 6 | 0.80 | 80% | Two circuits shared |
| 7 to 9 | 0.70 | 70% | Small control bundle |
| 10 to 20 | 0.50 | 50% | Filled raceway |
| 21 to 30 | 0.45 | 45% | Dense conduit run |
| 31 to 40 | 0.40 | 40% | Heavy tray fill |
🔧Common Breaker to Copper Wire Pairing
| Breaker | Copper AWG | Aluminum AWG | Typical Load | Voltage |
|---|---|---|---|---|
| 15 A | 14 | 12 | Lighting, outlets | 120 V |
| 20 A | 12 | 10 | Kitchen, garage | 120 V |
| 30 A | 10 | 8 | Dryer, RV, well | 240 V |
| 40 A | 8 | 6 | Range, cooktop | 240 V |
| 50 A | 6 | 4 | EV charger, welder | 240 V |
| 60 A | 4 | 3 | Subpanel, spa | 240 V |
| 100 A | 3 | 1 | House feeder | 240 V |
| 125 A | 2 | 1/0 | Large subpanel | 240 V |
| 150 A | 1 | 2/0 | Small service | 240 V |
| 200 A | 2/0 | 4/0 | Main service | 240 V |
⚙Formula Breakdown
💡Practical Sizing Tips
Cutting corners here can result in burned insulation, which you don’t ever want to do again. However, selecting the correct wire are more important than saving a few cents on copper. So how do you get it right? That’s the problem. Looking something up in a chart isn’t always enough. How about long runs through basements, cramped conduit, or realy hot attics? Those thing will affect what a given wire can handle.
Matching the AWG gauge of your wire to a breaker size are dangerous. A wire’s length and thermal environment has to be considered. The typical starting point is whatever we’re familiar with, usually what the circuit breaker says or what’s printed on an appliance name plate. That is only half of the equation though. Each conductor have an ampacity, meaning how much current it can handle before it heats up insulation. The current creates heat as it passes through the conductor due to electrical resistance. If it heats faster then it cools, then the insulation will degrade. Proper sizing result in the wire staying cool enough for decades.
Why Wire Size Matters for Safety
It’s a balancing act between efficiency and safety, but one most homeowners don’t think about until a nuisance trip or something worse happen. What matters is the environment surrounding your wire. When stuffed inside a crowded conduit bundle that is directly exposed to sunlight, it behaves much different than in an open, cool wall cavity. Heat tends to trap heat. Several wires bunched together insulates one another.
This tool here does all the math for you, using correction factors based off the number of current-carrying conductors in a raceway, as well as ambient temperature. Running four or more wire side-by-side greatly reduces the ampacity, because they can’t shed heat effectivey. They run dangerously hot anyway, though the breaker doesn’t trip. It’s a hidden fire hazard if you don’t account for it.
The other thing that tends to get DIYers is voltage drop, especially on long runs. Ampacity protects the wire itself, but it won’t ensure sufficient voltage reaches the load. Resistance cause voltage to drop as it travels over a distance. The calculator accounts for this by calculating the percentage of voltage dropped along your run. It’ll advise you to upsize if the drop is too great, typically more than three percent in branch circuits, to keep equipment performing as designed at the end of the line rather then just protecting the wire during its trip.
The second part is material selection. Copper is the standard for good reason, offering high conductivity and ease of termination. Aluminum has lower conductivity (higher resistance) and will carry less current for its size, so if you opt to go with this it usualy means upsizing by one or two steps in gauge to get the same performance. That’s handled automatically by the tool, so you don’t have to do any complex conversions to compare apples-to-apples. This is a small detail that makes a difference when working out cost on a whole-house rewire.
There are also presets for typical scenarios such as an EV charger or dryer or kitchen outlet so you can get a sense of what variables does to each other. For example, a load with 12 gauge wire running thirty feet is fine on a 20-amp circuit, whereas that same load at one hundred feet may require 10-gauge wiring to maintain acceptable voltage drop. It isn’t always just about the amps; it’s also about distance.
These are some good reference numbers to plan by but don’t take them as the last step to getting a permit stamped. Your terminal rating, or local code may require lesser amperage than what is stated here in generic terms. For long-term installs you should of always consult with an electrician or local authority. However, it makes choosing material and sizing much easier by taking the guesswork out of it. It turns the process into a logical, straightforward procedure based on the physics of the wire itself. It takes a complex chart and makes it a comfortabley plan with solid reasoning why that gauge should be used instead of another.