Wall Framing Lumber Calculator
Take off framing lumber by the piece. Enter your total wall length, wall height, and stud spacing, then add corners, T-intersections, and openings to get studs needed, plate lineal feet, total pieces, and board feet with a waste allowance built in.
🏗Real Framing Presets
📏Wall Framing Inputs
Add up every wall run getting these studs.
Finished wall height, typically 8, 9, or 10 ft.
16 inch OC is the residential default.
Each corner adds 3 studs for nailing surface.
Each tie-in adds 1 backer stud.
Each opening adds about 4 studs (kings, jacks, cripples).
Plate lineal feet = wall length times layers.
Used to count plate pieces from lineal feet.
Covers bad boards and cut-offs, usually 10 to 15.
You buy whole boards, so up is realistic.
🔢Takeoff Snapshot
📏Stud Spacing Options and Code Use
| Spacing | Studs per 8 ft | Typical Use | Code Note |
|---|---|---|---|
| 12 inch OC | 9 | Tall or heavily loaded walls | Used for 2x4 walls over 10 ft or high wind |
| 16 inch OC | 7 | Standard load-bearing walls | Default for most residential framing |
| 24 inch OC | 5 | Advanced framing, non-bearing | Allowed for 2x6 bearing walls per code tables |
| 16 inch OC | 7 | Garage and shop walls | Pairs with standard 8 ft precut studs |
| 24 inch OC | 5 | Interior partitions | Common for non-structural room dividers |
📋Studs Per Wall Length at 16 Inch OC
| Wall Length | Field Studs | Add One Corner | Add One Opening |
|---|---|---|---|
| 8 ft | 7 | 10 | 11 |
| 10 ft | 9 | 12 | 13 |
| 12 ft | 10 | 13 | 14 |
| 16 ft | 13 | 16 | 17 |
| 20 ft | 16 | 19 | 20 |
| 24 ft | 19 | 22 | 23 |
| 32 ft | 25 | 28 | 29 |
| 40 ft | 31 | 34 | 35 |
🛠Corner and Intersection Framing
| Detail | Studs Added | Nailing Surface | When To Use |
|---|---|---|---|
| 3-stud corner | 3 per corner | Both walls, full drywall backing | Traditional and most common corner |
| 2-stud + drywall clip | 2 per corner | Clip carries the inside edge | Advanced framing to save lumber |
| T-intersection backer | 1 backer stud | Ladder blocking as an option | Where a partition ties into a wall |
| Door opening | 4 (kings, jacks, cripple) | King and jack studs each side | Every door rough opening |
| Window opening | 4 plus cripples | Sill and header cripples | Every window rough opening |
📐Header Size by Opening Span
| Opening Span | Typical Header | Jack Studs Each Side | Note |
|---|---|---|---|
| Up to 3 ft | Doubled 2x6 | 1 | Small windows and interior doors |
| 3 to 4 ft | Doubled 2x8 | 1 | Standard entry doors |
| 4 to 6 ft | Doubled 2x10 | 2 | Wide windows and patio doors |
| 6 to 8 ft | Doubled 2x12 | 2 | Double doors, garage man-doors |
| Over 8 ft | Engineered LVL beam | 2 to 3 | Verify size with span tables |
📊Stud Spacing Comparison Grid
| Spacing | Studs per 10 ft Wall | Relative Load Capacity | Lumber Cost | Insulation Space | Typical Use |
|---|---|---|---|---|---|
| 12 inch OC | 11 | Highest | Highest | Least cavity room | Tall walls, high wind or snow |
| 16 inch OC | 9 | High | Moderate | Standard cavity | Default load-bearing walls |
| 24 inch OC | 6 | Adequate for 2x6 | Lowest | Most cavity room | Advanced framing, partitions |
| 16 inch OC 2x4 | 9 | High | Moderate | 3.5 in batt space | Interior and short exterior walls |
| 24 inch OC 2x6 | 6 | High with deeper stud | Lower | 5.5 in batt space | Energy-efficient exterior walls |
| 12 inch OC 2x6 | 11 | Very high | Highest | 5.5 in but crowded | Heavy point loads, tall gables |
⚙Formula Breakdown
💡Framing Takeoff Tips
And then there you are in the lumber aisle clutching the same old clipboard marked “thirty-two studs” but now you see that there is more studs required on this wall than originally counted. Your stack shrinks as you realize you need extra for headers and corners. You also have to account for the fact that lumber is never completely straight. Enter: Panic Mode.
This shows why a good framing take off are important. It’s one thing to have volume, the calculator will do that part for you if you simply input your measurements. But it’s another thing entirely to go from vague guesses to an exact shopping list. That list needs to take into consideration waste and all the other structural items you can’t overlook. Because it’s not really all just about counting up boards…it’s about how those boards behave as walls.
Why You Need to Count Your Lumber Carefully
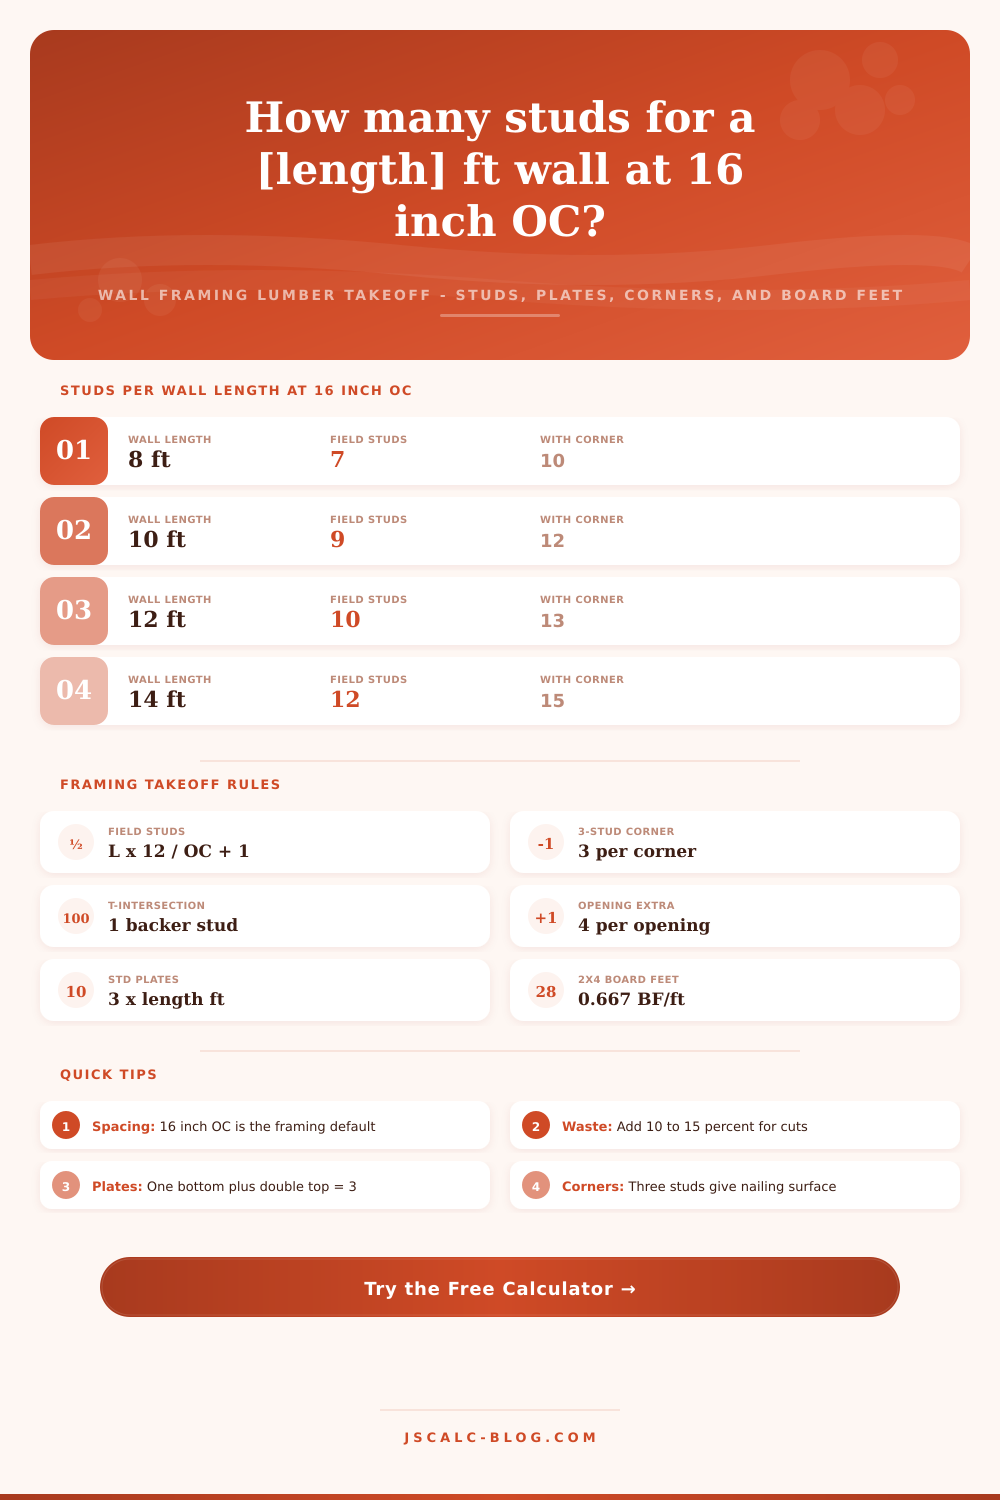
Spacing determines stud count, and stud count drives the cost of an estimate for any wall. Sixteen inches on center is standard for most residential construction; it’s a nice even number, and it matches up well with common sheet goods (plywood, drywall). Calculating amount of field studs is easy: simply take your total length and divide it by your spacing, then round up to get the last stud at the far end of the run. For example, a wall forty feet long require thirty-one field studs. Simple right?
Except a wall isn’t a straight line of vertical lumber; oh no, there are edges to be framed as well! Now we’re getting to the good part. Which edges require special care? DIY estimates break down at corners. Traditional corners has three studs, two from each intersecting wall and one common stud in between. That gives you a firm base to nail your drywall or sheathing into from the inside and out. Without it, you’ll get the sensation of hollow walls and its going to be difficult for your finish carpenter to fasten anything.
You need to add backing to T-intersections because when an interior partition ties into an exterior wall, you need a backer stud to nail into. The calculator accounts for this automatically according to the number of corners and intersections you specify, but without it, you’ve got a new wall just floating in space.
The other wildcard would be openings… Every window and door has to be framed in a way that extends beyond just vertical studs. There’s got to be king studs running the whole height, and jack studs supporting the header. Then there’s cripple studs filling in below and above the opening. They’re easy to miss counting for since they hide within the wall cavity, but each rough opening typical adds at least four more sticks of lumber to the total. With two windows and one door, you need twelve more studs right there in this one bedroom.
This is before anyone even considers waste, which is what everyone forgets when they have to make a second trip out to the yard. Lumber arrives twisted, crowned, or split; it’ll also have pieces too short for re-use in any crucial spot, which means you should of never skimp on waste: Ten percent is the absolute bare-minimum buffer; 15 percent’s better if you’re using less-good lumber, or your wall’s full of openings. The tool adds the waste percentage to your total number of studs and rounds up. Since you can’t purchase three-quarters of a board, that step alone will save you from scrambling for lumber partway through the build.
There is also a difference between studs and plates. You don’t count them as individual pieces at first; you do it by lineal feet. A normal wall is three layers thick, with a single layer on the bottom and a double layer on the top. A forty-foot-long wall requires 120 lineal feet of two-by-four lumber. The calculator tells you how many actual boards you’ll have to buy, based off the length divided by the size board you’ve selected. It is a small distinction, but it makes all the difference when you are loading the truck.
Board Feet While it may sound old-fashioned, board feet is still how wood is measured in terms of volume and price. If we take a two-by-four as an example, that’s about.67 board feet per lineal foot. Multiply that number times the linear footage of all your studs plus all your plates, and you’ve got an approximation of the amount of lumber needed. That allows you to compare jobs. You can check the math on a supplier quote, as some will give price-per-board-foot instead of price-per-piece. This bridges the gap between actual numbers and dollars spent, which will save your sanity.
To help get a fast answer for typical situations, the tool includes quick reference tables below it which give you a look at what your studs count will be depending on various spacings. For example, 24 inches apart is cheaper and allows extra space for insulating, so that’s good if you’re practicing advanced framing methods or building a non-bearing interior partition wall. But 12 inches apart can be required when the structure must support heavy loads or is especially tall. So, how do you know where to draw the line between cost-saving and safety? The tool lets you see those decisions side-by-side.
Begin by selecting a pre-set for your project. This could be a complete perimeter of your house, perhaps, or maybe just a little wall in the back of a shed. Tweak the inputs and watch as your estimate adjusts to match, including the adjustment when you add an opening. Then view the breakdown and understand precisely which pieces go where.
This makes the math concrete, so you’ll head out to the yard feeling confident that you’ve got all the wood needed to get the job done: the plates, the studs, and, because this is reality, the wrong ones we’re bound to cut along the way. You won’t have to guess, because you will have a workable list.