Star Force Calculator
Estimate the expected meso cost, expected number of booms, and average taps to push MapleStory equipment from your current star level to your goal, using standard Star Force success, maintain, decrease, and destroy rates with safeguard and star catch options.
⭐Real Star Force Presets
📝Enhancement Inputs
Meso cost scales with item level cubed.
MVP Silver 3%, 30% off event, etc.
Only used when method is Monte Carlo.
🔢Model Snapshot
📊Per-Star Outcome Rates
| Star Step | Success | Maintain | Decrease | Boom | In Your Range |
|---|---|---|---|---|---|
| Enter values above to build the per-star rate table. | |||||
💰Expected Cost By Star Step
| Star Step | Base Meso / Tap | After Discount | Exp. Taps | Exp. Booms | Exp. Meso For Step |
|---|---|---|---|---|---|
| The cost breakdown appears after calculation. | |||||
🗂Standard Star Force Reference Grid
| Star Step | Success | On Fail | Boom | Safeguard Boom | Difficulty |
|---|---|---|---|---|---|
| 0 → 3 | 95% to 85% | Maintain | 0% | 0% | Very easy |
| 5 → 10 | 84% to 70% | Maintain | 0% | 0% | Easy |
| 10 → 12 | 70% to 60% | Maintain | 0% | 0% | Moderate |
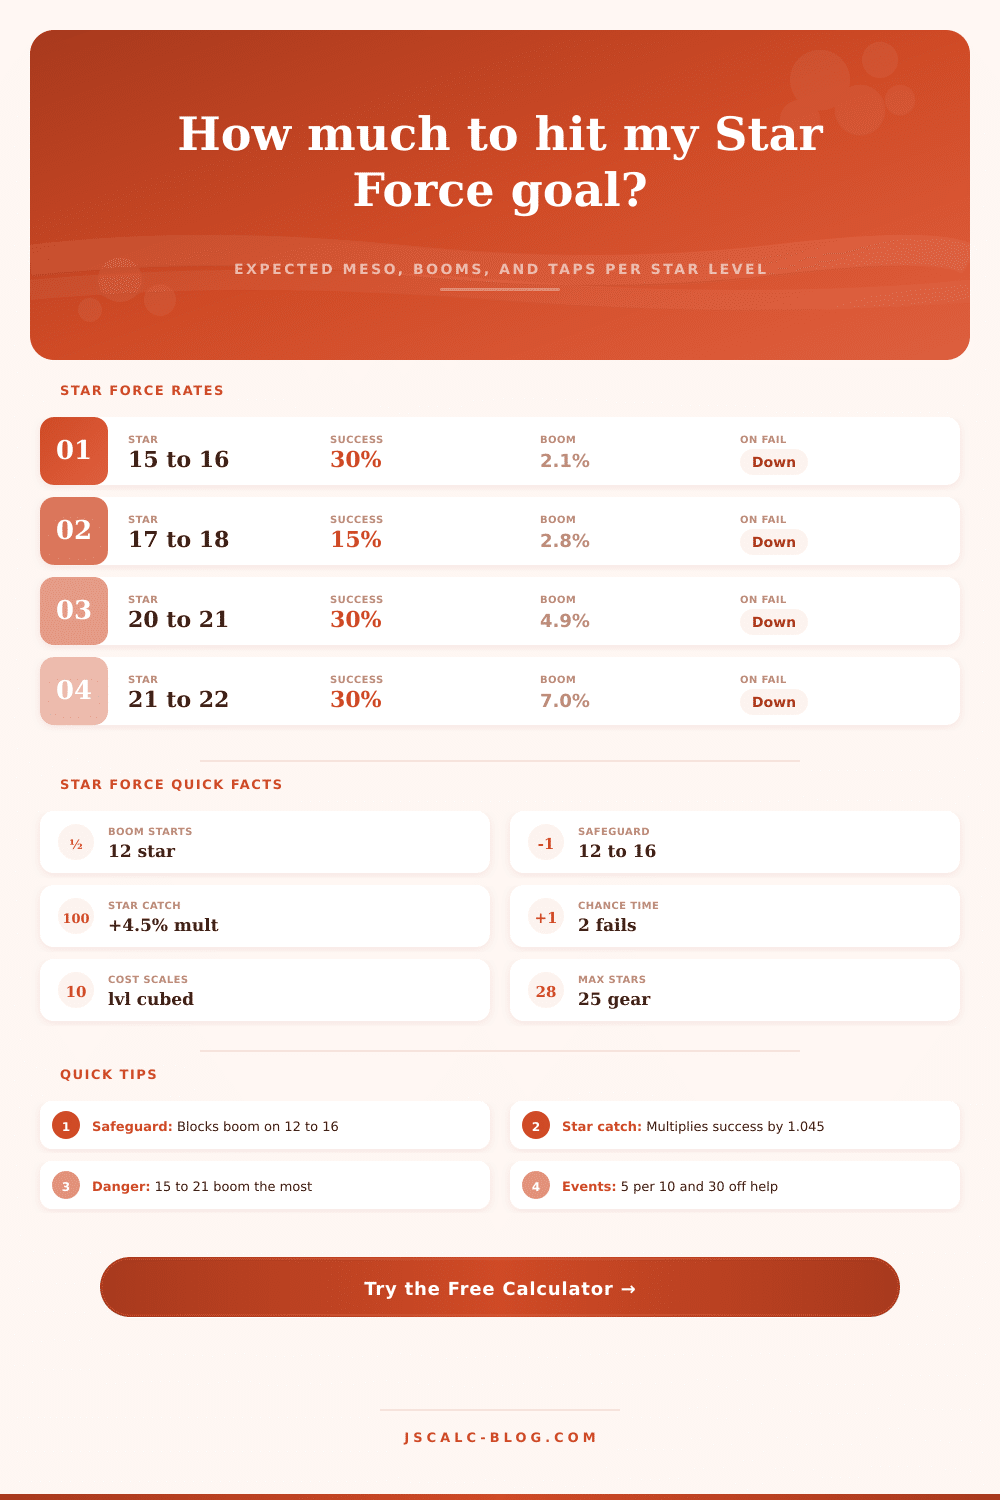
| 12 → 15 | 55% to 40% | Decrease | 1.0% to 2.1% | 0% safe | Risky |
| 15 → 17 | 30% to 30% | Decrease | 2.1% to 2.8% | 0% safe | Danger |
| 17 → 20 | 15% to 30% | Decrease | 2.8% to 4.0% | No safe | Brutal |
| 20 → 22 | 30% to 30% | Decrease | 4.9% to 7.0% | No safe | Extreme |
| 22 → 25 | 3% to 30% | Decrease | 10% to 20% | No safe | Endgame |
⚙Expected-Value Method Breakdown
📋Boost & Discount Reference
| Option | Typical Value | How It Is Used | Effect On Result |
|---|---|---|---|
| Star catch | × 1.045 success | Multiplies base success rate | Fewer taps and fewer booms |
| Safeguard | 2× meso, 12 to 16 | Removes boom on those steps | Higher cost, no destroys there |
| Chance Time | 2 fails to pass | Forces success after 2 fails | Caps taps stuck on a star |
| MVP discount | 3% to 10% | Cuts meso per tap | Lower expected total cost |
| Event discount | 30% off | Cuts meso per tap | Lower expected total cost |
| 5/10/15 event | Guaranteed pass | Skips risk on those steps | Zero booms at 5, 10, 15 |
💡Practical Star Force Tips
Here you are, standing on star fifteen wielding a top-tier weapon. On the screen sits an option to do greater damage… or completely screw yourself over. Do you click enhance? After spending hours accumulating mesos to get here, do you hesistate? Luck isn’t as important as having a level head. The math are harsh.
Here is a tool that use data to put your panic into perspective. It shows you what things will cost realisticly and how risky they’ll be before you commit resources.
How to Manage Risk in Star Force
Star force is treated as a slot machine by most player, who pull the lever until their fortune runs out (or in). It’s financially reckless, because it disregard the scaling nature of costs. The enhancement fee isn’t linear; it increase by the cube of an item’s level. Every little bump up in gear levels result in a big leap upwards in cost-per-tap. Upgrading a level two-hundred weapon won’t be cheap compared to upgrading a level one-hundred and fifty piece of equipment. Don’t forget this exponential increase when budgeting, otherwise you’ll find yourself without mesos after seemingly minor upgrades.
It simulates the situation as a Markov chain to get some expected values. That include things like booms, decreases, failure, and safeties. And it’s an average across thousands of tries, meaning that your one attempt probably won’t be the average. You might get lucky and hit your target in half the predicted cost or you might grind for hours and still see a decrease. This is the baseline that helps you account for variance… And not just hope it doesn’t happen.
The biggest choice for mid-tier stars is Safeguard. Once you have between 12 and 16 stars, there’s an increasing danger of destroying your progress. With safeguard on, you don’t get that boom chance at all. That’s a high price: Safeguard costs twice as much in mesos per tap.
That seems like a lot, until you consider the alternative. If you destroy a star, you go back to being star 12, which means regaining the lost ground one star at a time, each costing full price. For most scenario where you’re wearing good stuff, paying double now for insurance is less costly than having to replace whatever was broken. (Yes, the overall meso cost look higher with safeguard turned on, but look at how many fewer booms happen.)
Unlike other methods that block things from happening, star catch change the odds. And it’s really tiny. A single use of star catch increase your success rate by one point zero four five. That might sound small, but it adds up with each tap. If you’re struggling on star seventeen with a fifteen percent success rate, maybe it’ll be enough to let you push past where you were stuck without grinding forever. But: Star catch doesn’t stop booms. It merely nudges the odds a little bit more in your direction.
Still, you have to decide if having an extra shot at success is worth the extra cost, especially if your server limit how much you use or charges you for it.
It’s all about events. Events can flip the whole equation overnight. You get a guaranteed success event OR a 30% discount off of enhancements? Suddenly that huge cost is doable! Rather than pushing your gear live, smart players sit back and watch for those windows of opportunity. You can plug those discounts into the calculator as well. Input “I’m getting a 30% discount” and it will show you how much money you’ll save by waiting two weeks for that event versus paying now. And most times those savings will pay for themselves just from less stress and using less inventory.
Risk management in Star Force ultimately comes down to this: you’re gambling with mesos for the statistical chance that something good happens. Instead of blindly guessing, you can now use the tool to plan out which stars to shoot for with your exact setup. You can also see how much it is going to cost. While it won’t stop a bad run, it’ll make sure you don’t go into one blind. It’ll help you know what you’re paying for so you could of enjoyed the game rather than dread each tap on your screen.