Pole Barn Roof Pitch Calculator
Size a post-frame gable roof from span and pitch: rafter length, ridge height, both-slope roof area, truss and bent count, purlin runs, and metal panel counts for wide-span barns.
🎯Real Pole Barn Presets
📝Building & Roof Inputs
Gable-end width, ridge to ridge across both slopes.
Post-frame bents are commonly 8 ft on-center.
Net coverage of a rib panel, default 36 in (3 ft).
📐Geometry Snapshot
🧱Metal Panel & Purlin Plan
📊Span vs Roof Comparison Grid
Fixed at 4/12 pitch, 60 ft length, 12 ft posts, 8 ft spacing, 1 ft overhang.
| Span | Run | Rise | Rafter | Roof Area | Trusses |
|---|---|---|---|---|---|
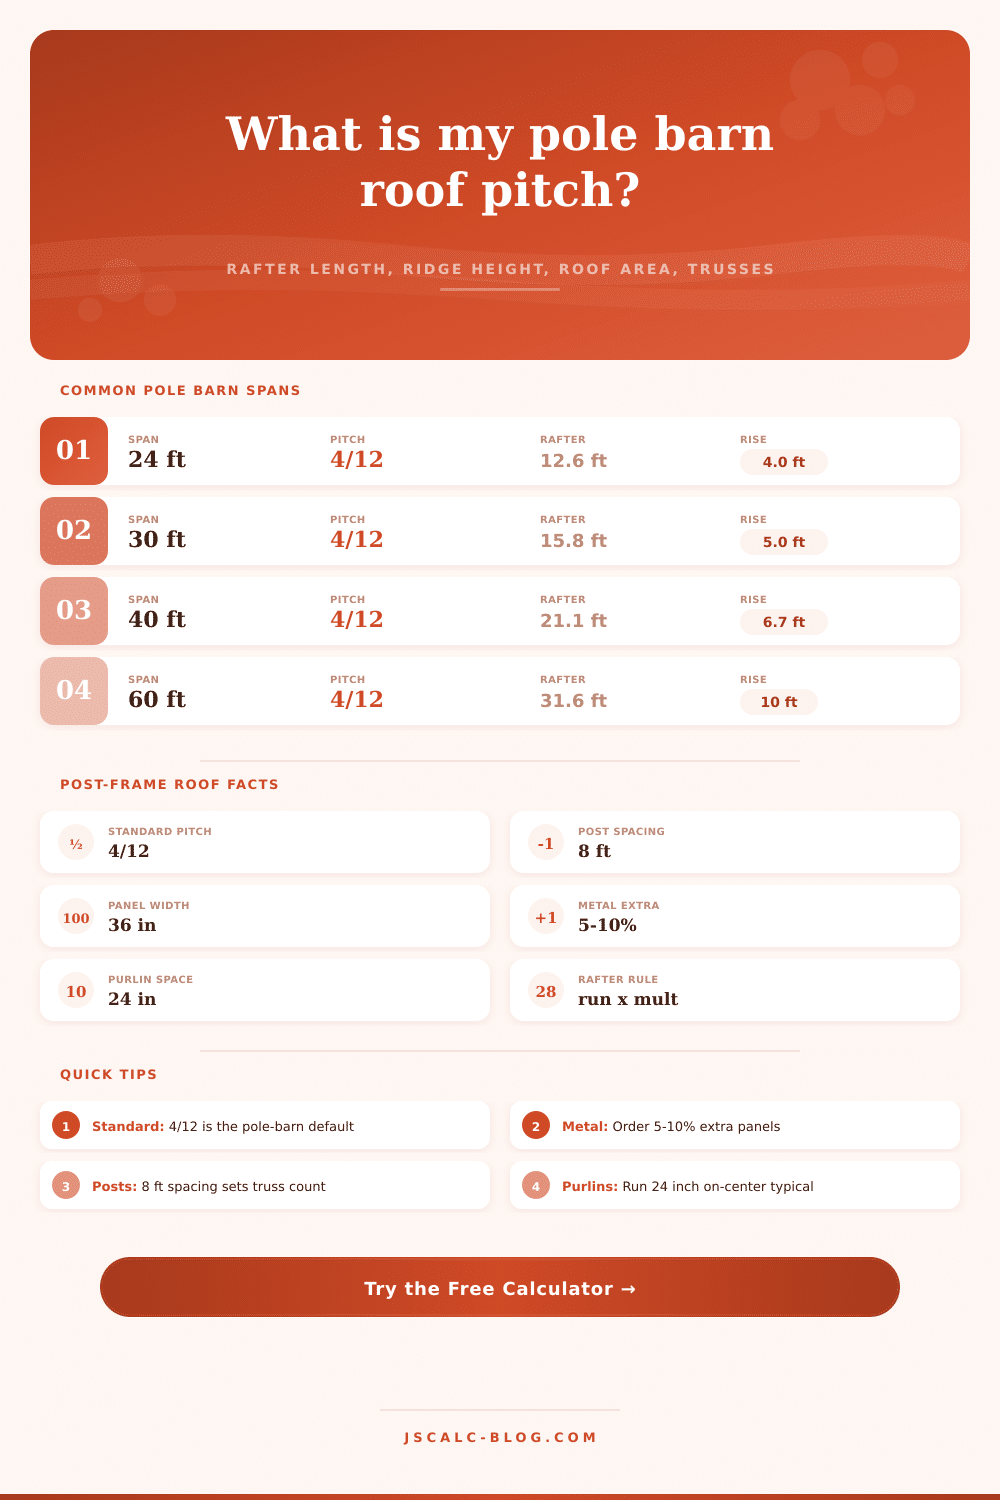
| 24 ft | 12 ft | 4.00 ft | 12.65 ft | 1,638 ft² | 8 |
| 30 ft | 15 ft | 5.00 ft | 15.81 ft | 2,017 ft² | 8 |
| 36 ft | 18 ft | 6.00 ft | 18.97 ft | 2,397 ft² | 8 |
| 40 ft | 20 ft | 6.67 ft | 21.08 ft | 2,650 ft² | 8 |
| 48 ft | 24 ft | 8.00 ft | 25.30 ft | 3,156 ft² | 8 |
| 50 ft | 25 ft | 8.33 ft | 26.35 ft | 3,282 ft² | 8 |
| 60 ft | 30 ft | 10.00 ft | 31.62 ft | 3,915 ft² | 8 |
| 72 ft | 36 ft | 12.00 ft | 37.95 ft | 4,674 ft² | 8 |
📋Common Pole Barn Spans & Pitches
| Building Use | Typical Span | Common Pitch | Roof Angle | Notes |
|---|---|---|---|---|
| Compact garage | 24–30 ft | 3/12 to 4/12 | 14°–18° | Single-truss economical |
| Detached shop | 30–40 ft | 4/12 | 18.4° | Standard post-frame pitch |
| Horse / livestock barn | 36–48 ft | 4/12 to 6/12 | 18°–26° | Loft or hay clearance |
| Machine / equipment shed | 48–60 ft | 4/12 | 18.4° | Clear-span trusses |
| Riding arena | 60–80 ft | 3/12 to 4/12 | 14°–18° | Wide clear-span bents |
| Cold / snow region | Any | 6/12 or steeper | 26.6°+ | Sheds snow load faster |
📏Rafter Length By Span At 4/12
| Span | Run | Rise (4/12) | Rafter Length | Rafter (m) |
|---|---|---|---|---|
| 20 ft | 10 ft | 3.33 ft | 10.54 ft | 3.21 m |
| 24 ft | 12 ft | 4.00 ft | 12.65 ft | 3.86 m |
| 30 ft | 15 ft | 5.00 ft | 15.81 ft | 4.82 m |
| 36 ft | 18 ft | 6.00 ft | 18.97 ft | 5.78 m |
| 40 ft | 20 ft | 6.67 ft | 21.08 ft | 6.43 m |
| 48 ft | 24 ft | 8.00 ft | 25.30 ft | 7.71 m |
| 60 ft | 30 ft | 10.00 ft | 31.62 ft | 9.64 m |
🛠Metal Panel Coverage & Post Spacing
| Item | Common Value | Range | Used For |
|---|---|---|---|
| Panel coverage width | 36 in (3 ft) | 24–36 in | Panels across each slope |
| Panel length stock | Cut to slope | 8–24 ft | Rows up the rafter |
| Post / bent spacing | 8 ft on-center | 4–12 ft | Truss and bent count |
| Purlin spacing | 24 in on-center | 16–24 in | Panel and load support |
| Overhang / eave | 12 in | 0–24 in | Adds to roof area |
| Waste allowance | 10% | 5–15% | Cuts, trim, and offcuts |
⚙Full Formula Breakdown
💡Practical Pole Barn Tips
So there you are standing in an empty field holding poles and dreaming of a long lasting metal building. Finding land isn’t really difficult. Figuring out how tall the ridge beam should be so it sheds water without having a roof as high as a mountain are difficult. At this point geometry cease to be abstract math and begins to dictate your lumber bill. A pole barn roof pitch calculator will do all the trigonometry for you.
Knowing what result mean will save you from ordering wrong steel and buying rafters that won’t fit your budget. Span (the distance between your two outside wall) is biggest factor. Divide that number in half and you have the run (so you know how far horizontally out from the wall plate to the middle of your roof). Then there’s the rise, which comes from the pitch.
How Roof Pitch Affects Your Building Costs
If your pitch is 4/12, that means for each 12 inches the roof runs horizontally, it will rise four inches. That’s industry standard, and with good reason: It provides a lower roof profile without having to worry about snow or rain sliding down to slowly. If your pitch is steeper, say 6/12, then you’d be paying more for materials (longer rafters), but getting better water shedding.
You can see the tradeoff and how changing the pitch and span affectss the rafter length by playing with the numbers on the calculator. The calculator instantly shows how the rafter length change. Where many folks make expensive mistakes is in rafters. They fail to realize that diagonal measurement is always longer than horizontal and they end up measuring the wrong dimension (the run rather than the hypotenuse). A span of forty feet at a 4/12 pitch has an actual rafter length near twenty-one feet, not the twenty feet they measured as the run.
When you’re ordering materials by the board foot, and attempting to get them home in your standard pickup truck bed, every extra foot counts. And that’s what the tool calculates: that exact diagonal which you would otherwise guess (and probably cut out yourself onsite). That’s why it saves you money.
The cost of metal panels. After calculating rafter length, your next step is to calculate the total roof area. That’s where most people makes the mistake of simply multiplying length x width. Remember: We’re dealing with a gable roof with two sloped sides plus an overhang at the eaves. Many people neglect those overhangs in their sketch., you’re forgetting a huge part of your total surface area.
For example, a 12-inch overhang on either side multiplies every rafter’s linear footage, and when you multiply that by the number of bents, you’ve got a pretty hefty piece of extra roofing to buy. The calculator makes this correction for you, resulting in an accurate square footage instead of a simplified sketch based off floor plans.
This goes beyond roofing materials. The roof isn’t the only part of post-frame construction. You must space bents at least 8 feet apart to support the frame. You also need to know length of your building so you can order the exact number of truss frames. Nails and other structural hardware is ordered accordingly. Likewise, understanding the purlin spacing will impact how many horizontal supports (purlins) you’ll run across rafters to avoid sag in a snow or wind load. Standard metal panels needs a support every 24 inches on-center; if you change one thing, such as the rafter length, then another changes, such as the number of purlin rows. It all ties back to that first pitch decision.
Also keep in mind the waste factor, no job ever goes precisely to plan. Valleys, gable ends, ridge caps all require cuts which create scrap metal, so it’s smart to add a ten percent buffer to your panel count. Of course, this doesn’t apply if you happen to have a perfectly rectanglar roof without any holes or obstacles.
The reference table on the page will lay out common spans and what size they produce. That gives you a quick sanity check of your own inputs. If your numbers are wildly off from these benchmarks, there’s a good chance you either typed in a wrong span number, or accidently picked an unusual pitch.
So in the end, there are two poles: 1) Function and 2) Aesthetics. A flatter roof means cheaper framing, while a steeper one looks more traditional. But, if you have a really steep pitch, you’ll raise the overall peak height, which could violate local height limits or make removing snow from the eaves more difficult. If the roof is too flat, then you run the risk of rainwater pooling unless the panels are installed perfectly square.
Here is the solution. Choose a pitch that feels appropriate for your area’s weather conditions, then let the tool do all the other math. It takes a complicated structural issue and reduces it down to a shopping list. That way when you head off to supply yard, you can have peace of mind knowing every panel is accounted for and every rafter fits. This gives you the peace of mind that only comes from doing job right.