Lumber Package Calculator
Build a framing lumber takeoff for wall projects. Enter length, height, stud spacing, plate rows, corners, and openings to get a package list of studs, plates, headers, total pieces, and board feet.
📌Framing Package Presets
📐Wall & Framing Inputs
Combined linear feet of all walls in this package.
Each wall adds one end stud to the line count.
Adds 3 studs each for corner posts and T-walls.
Adds 2 king/jack studs and 1 header each.
🧱Package Parts List
| Framing Member | Size | Length | Qty | Board Feet |
|---|---|---|---|---|
| Enter wall dimensions above to build the parts list. | ||||
🔢Framing Rules Snapshot
📊Studs Per Linear Foot by Spacing
| Spacing (OC) | Studs / Ft | Studs / 10 Ft | Studs / 20 Ft | Common Use |
|---|---|---|---|---|
| 12 in | 1.00 | 11 | 21 | Heavy load, tile backer walls |
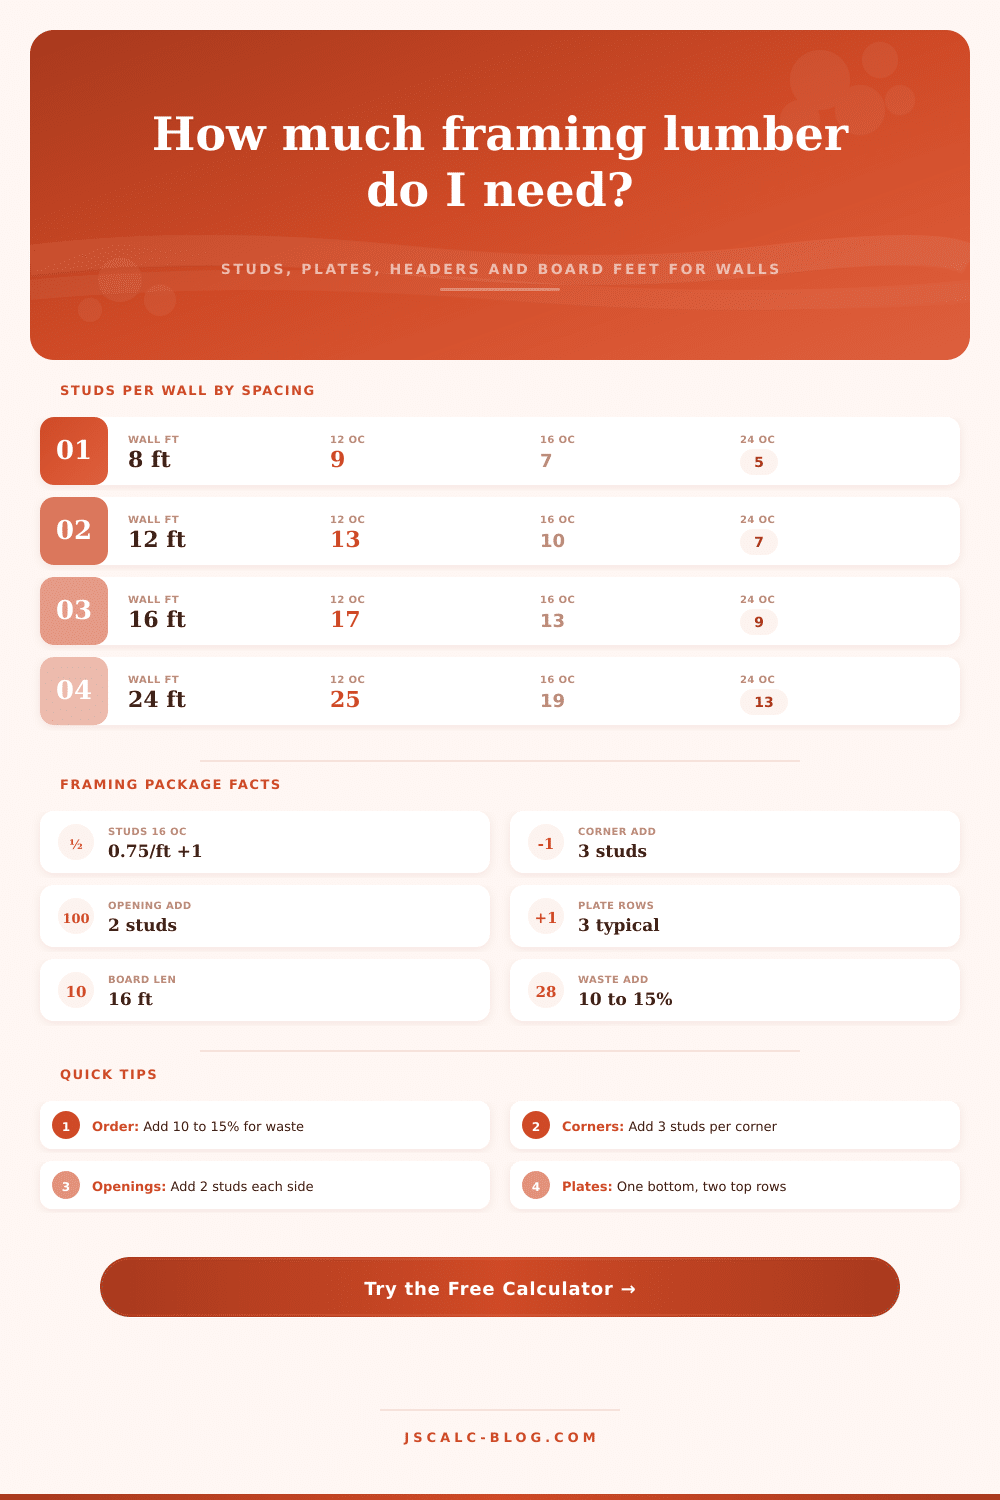
| 16 in | 0.75 | 9 | 16 | Standard walls and most codes |
| 19.2 in | 0.625 | 8 | 14 | Advanced framing on layout |
| 24 in | 0.50 | 6 | 11 | 2x6 exterior, single-story |
📏Board Feet by Nominal Size
| Nominal | Actual (in) | BF / Linear Ft | 8 ft Stud BF | 16 ft Plate BF |
|---|---|---|---|---|
| 2x4 | 1.5 × 3.5 | 0.438 | 3.50 | 7.00 |
| 2x6 | 1.5 × 5.5 | 0.688 | 5.50 | 11.00 |
| 2x8 | 1.5 × 7.25 | 0.906 | 7.25 | 14.50 |
| 2x10 | 1.5 × 9.25 | 1.156 | 9.25 | 18.50 |
| 2x12 | 1.5 × 11.25 | 1.406 | 11.25 | 22.50 |
🗂Wall Length vs Package Comparison
| Wall Run | Studs 12 OC | Studs 16 OC | Studs 24 OC | Plate BF (3 rows) | Board Ft 16 OC 2x4 |
|---|---|---|---|---|---|
| 8 ft | 9 | 7 | 5 | 10.5 | 38 |
| 10 ft | 11 | 9 | 6 | 13.1 | 44 |
| 12 ft | 13 | 10 | 7 | 15.8 | 55 |
| 16 ft | 17 | 13 | 9 | 21.0 | 65 |
| 20 ft | 21 | 16 | 11 | 26.2 | 82 |
| 24 ft | 25 | 19 | 13 | 31.5 | 99 |
| 32 ft | 33 | 25 | 17 | 42.0 | 126 |
| 40 ft | 41 | 31 | 21 | 52.5 | 161 |
⚙Full Framing Formula Breakdown
📋Standard Framing Member Reference
| Member | Typical Size | Role in Package | Count Rule |
|---|---|---|---|
| Field stud | 2x4 or 2x6 | Vertical wall support | Run ÷ spacing + 1 per wall |
| Bottom plate | 2x4 or 2x6 | Anchors wall to floor | One row of run length |
| Top plate | 2x4 or 2x6 | Ties studs and joins walls | Two rows of run length |
| King stud | Full-height 2x | Frames opening sides | 1 per opening side |
| Header | Doubled 2x with spacer | Carries load over opening | 1 per door or window |
| Cripple stud | Short 2x offcut | Above and below openings | Reuse waste allowance |
💡Framing Takeoff Tips
The panic: You’re standing in front of a stack of lumber, holding your list of measurements, and there’s something about seeing all those 2 x 4’s lined up before you that makes you feel like you might not know what to order. Seventeen? For an eight-foot wall? You aren’t sure. It’ll be close, but will you come up short on the last day of framing, with the sun setting as you sit on hold waiting for the delivery guy, who probably has somewhere else he’d rather be, to save you? Or will you overdo it and end up carrying twice as many board back to the house (filling your truck bed) because, well, you never know, right?
The difference between chaos and confidence usually comes down to understanding how spacing dictates quantity. To figure out exactly how many studs you need, you could measure every single inch of the wall and then add one for good luck. Or you can rely on the fact that the math is rigid. Take your total linear footage of the wall and divide it by the spacing distance on center. Note that you must convert inches to feet for this equation. Then, add one additional stud. This is because all walls require an end piece, even if there is only room for one interval. Framing 101: that plus one rule never negotiates. If you forget to apply it, your wall will have a gap with no nails to hold anything down.
How to Count Lumber for Your Walls
That’s the kind of arithmetic you can get away with doing on paper (or in your head) if you’re only planning on running a single wall, but the way I understand it, not when you’ve got more than one. Thankfully, this page does all the math for you. Just enter the total run of all your walls, pick your preferred spacing (twelve to twenty-four inches on center), and it’ll spit out exact number for your vertical supports. It even takes into account things like openings and corners, which is what most rough estimates won’t do.
Each corner and any T-intersection needs three studs, not just one, to provide a solid nailing surface on both planes. And doors and windows need jack and king studs to frame the opening correctly, along with a header to support weight above. They come up often enough that forgetting about ’em will send your snug estimate out of whack by noon.
The other place that common sense doesn’t help as much is with plate lumber. You only have a single bottom plate to attach the wall to the floor. However, standard practice use double top plates so the load spreads evenly through the wall frame and adjacent walls tie together. That’s why you require 3 full length pieces of lumber per foot of wall run (not 2). The calculator explains this by breaking it down to how many complete boards you should of buy vs. What amount will be left over in offcuts if you’re working with 16 foot long boards for example. It translates this quantity into board feet, since that’s the unit lumber yards use when keeping inventory and quoting prices. Once you know your board footage, you can calculate if it makes financial sense to rip longer stock on your own and buy pre-cut studs, or go directly to a supplier to see who has the best price.
In every framing budget there’s one big X-factor: waste. Not every 2×4 is exactly straight, and not all dimensional lumber can be used structurally due to knots in the board. A ten to fifteen percent buffer above what you think you’ll use is not just conservative, it’s realistic. Someone’s going to screw up; you’re going to run into warped wood; you’re probably going to want to cut a stud down for a window sill. The calculator lets you change the percentage according to both your skill level and how crappy or nice the lumber is where you live. Higher waste allowances means more trips to the truck, but fewer emergency runs to the hardware store when you are hanging drywall.
There are also trade offs in stud spacing; whether you go 12, 16 or 24 inches apart. For example, use 12-inch spacing if you’re planning a tile backsplash or need to carry a heavier load. If your building method uses bigger dimensional lumber (like two by sixes) and you’re putting up an exterior wall in a one story home, then 24-inch works well because it’s more economical. Most interior partition walls stays at 16 inches for convenience. This fits exactly into 4-foot-wide drywall sheeting, which means fewer materials are wasted and there is less cutting through on the finished side. Knowing the pros and cons of each will help you make your decision based off both budget and structure.
A house is really just a puzzle… each piece has to fit into place before it resembles a house. The math matters because if you get the count correct prior to lifting that hammer then you save yourself time, money and aggravation. Once you have your package list, you can head back to the truck confident that you know what is going in the wall and exactly how many of each item you need, like the headers, plates, and studs.