Drywall Ceiling Layout Calculator
Plan a gypsum board ceiling with sheets running perpendicular to the joists. Count rows, sheets per row, total boards, and staggered butt and tapered seam length for any room size.
🏗Real Ceiling Presets
📏Ceiling & Sheet Inputs
Sheets are placed 90° to the joists. The 4 ft edge crosses the joists.
Auto keeps the sheet length crossing the joists for you.
🔢Layout Snapshot
📋Row By Row Breakdown
| Row | Full Sheets | Cut Piece | Row Offset | Butt Joints |
|---|---|---|---|---|
| Enter ceiling size above to see each row. | ||||
📐Sheet Sizes & Coverage
| Sheet Size | Coverage | Width | Handling | Best For |
|---|---|---|---|---|
| 4 × 8 ft | 32 sq ft | 4 ft | Easiest to lift | Small rooms, closets |
| 4 × 9 ft | 36 sq ft | 4 ft | Manageable solo | 9 ft wall carryover |
| 4 × 10 ft | 40 sq ft | 4 ft | Two people | Medium ceilings |
| 4 × 12 ft | 48 sq ft | 4 ft | Two people, lift | Fewer butt seams |
| 4 × 16 ft | 64 sq ft | 4 ft | Panel lift needed | Long great rooms |
🗂Ceiling Size Comparison Grid
| Ceiling | Area | Rows | Sheets 4x8 | Sheets 4x12 | Sheets 4x16 |
|---|---|---|---|---|---|
| 8 × 10 ft | 80 sq ft | 2 | 4 | 2 | 2 |
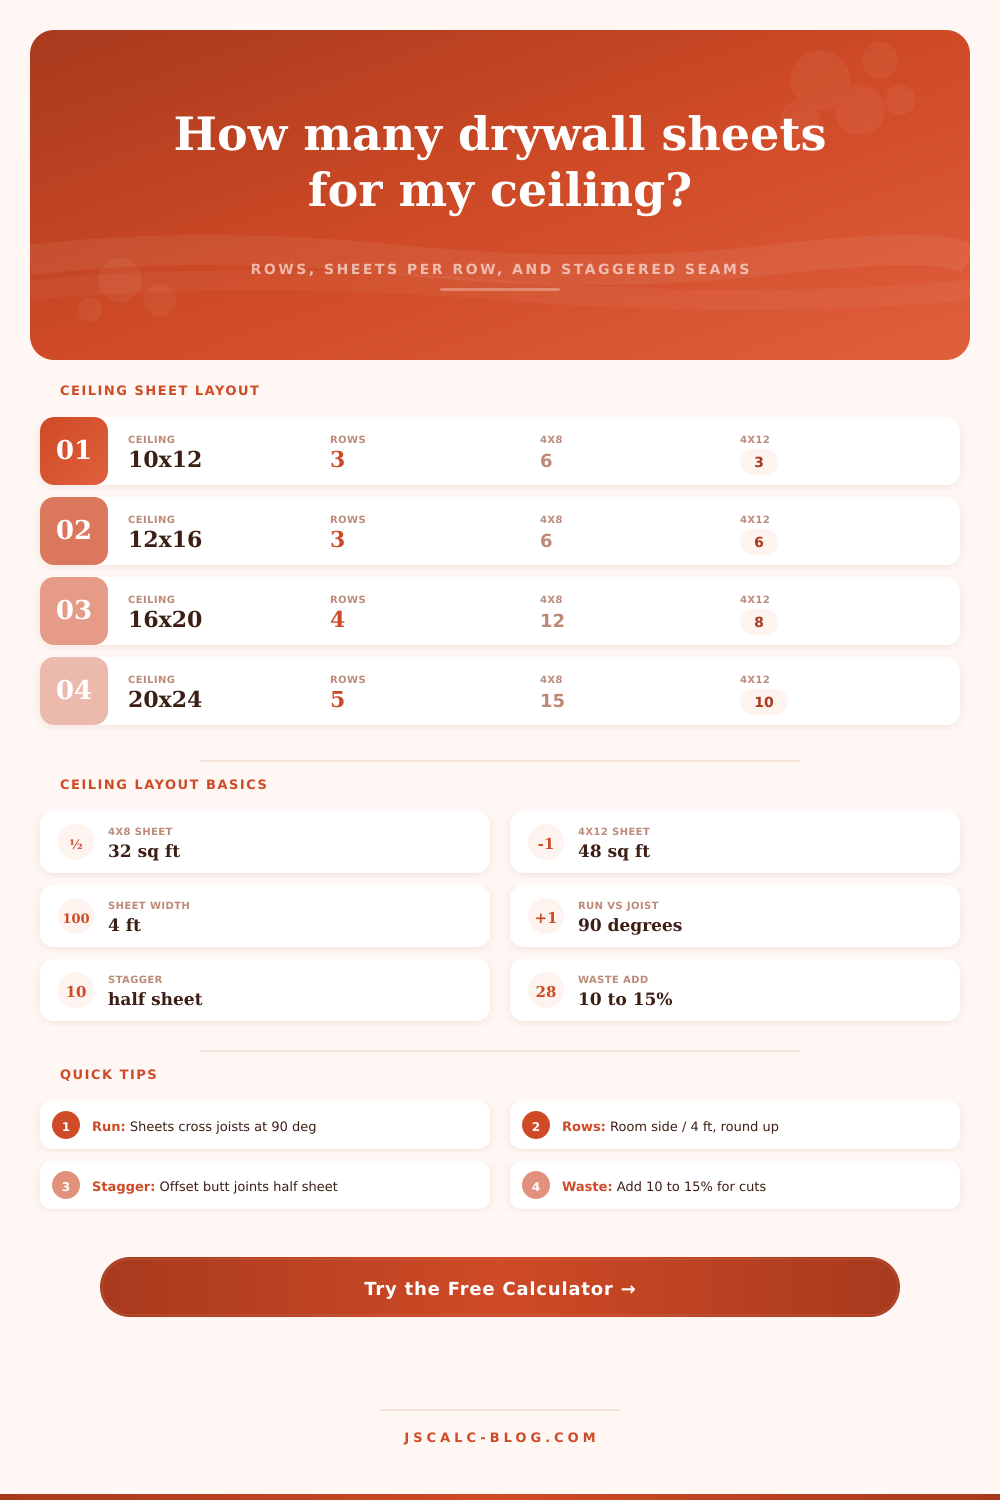
| 10 × 12 ft | 120 sq ft | 3 | 6 | 3 | 3 |
| 12 × 14 ft | 168 sq ft | 3 | 6 | 6 | 3 |
| 12 × 16 ft | 192 sq ft | 3 | 6 | 6 | 3 |
| 16 × 20 ft | 320 sq ft | 4 | 12 | 8 | 8 |
| 20 × 24 ft | 480 sq ft | 5 | 15 | 10 | 10 |
| 24 × 30 ft | 720 sq ft | 6 | 24 | 18 | 12 |
🧭Orientation & Seam Rules
| Rule | Guideline | Why It Matters |
|---|---|---|
| Sheet direction | 90° to joists | Ties joists together, hides bows |
| Long tapered edge | Runs along the row | Recessed edges make flat seams |
| Butt joints | Stagger half a sheet | No stacked seams to crack |
| End cut fall-off | Starts the next row | Cuts waste, builds the offset |
| Edge support | Land on a joist | Screws grip, seams stay firm |
| Fastener spacing | 12 in on ceilings | Prevents sag between framing |
⚙Full Layout Formula Breakdown
💡Practical Ceiling Tips
Before lifting a sheet of drywall, plan out how it will be laid down. It’s more than a bunch of lumber you have to hoist into place. Physics and some geometry are involved. Planning right keeps your walls from cracking months down the road. When you get the sheet layed out right, the ceiling appears seamless.
Most people think it’s easy: “Okay, I have X thousand square feet in my house; how many standard sheets do I need? Well, 1,000 divided by 32 is 31.25. I’ll round up and buy 32 sheets.” Not so fast. This formula is far too simplistic. It fails to account for waste, cut-offs, or any framing structures that will prevent sheet use. If your room happens to be awkwardly shaped (like a 200 sq ft room), you could end up needing three extra sheets just to fill the gaps at the edges. Maybe you want to cut an additional three sheets to fill those edge gaps.
How to Plan Your Drywall Layout
The tool on this page perform all these calculations for you. It converts your room measurements into a realistic plan for the number of columns and rows, and where the seams should go. That way there’s no guesswork… You just install it.
Drywall: Your drywall should be oriented with the long dimension running perpendicular to the ceiling joists. This provides structural support. It connects the framing pieces together. It also “bridges” slight bowing in the lumber. When sheets are installed parallel to the joists, they depends on the short edges to span from one piece of support to another. Over time, this can lead to sagging. The calculator defaults to the best practice; running them perpendicular to the joists. That way it knows which direction your joists run and can calculate the appropriate number of rows. When your joists align with length of the room, your sheets will run across the width. This affects the number of full courses and location of your seams.
Stagger butt joints at least half a sheet apart from row-to-row. You should stagger more if you’re using shorter panels. When you stack butt joints end-on-end, you have a weak vertical line that cracks as house settles or expands/contracts with temperature changes. Offsetting the seams spreads the stress over the ceiling plane. Skipping the offset means DIY ceilings fails visual inspection. Why? The layout calculator has an offset option for staggering. It’s worth your time to use it; otherwise, you’ll be paying later for joint compound and sanding.
Your work flow depends on sheet size Four by eight sheets require more seams than a four by twelve sheet of the same material. Fewer seams means less mudding and taping overall. But longer sheets is more difficult to handle without help and are heavier to move around. The tool comes with some reference tables that tells you the final number based off various sheet sizes against common room sizes. In other words, you may be able to save yourself quite a few seams by swapping out 8′ longs for 12′ longs. Assume you can set up your ladder to do so and get some help getting them in place.
Don’t forget about waste. Because drywall comes in sheets, cutting around corners, soffit drops, and light fixtures will create scrap. It’s wise to add a bit of padding (10-15%) to your final sheet count to account for such waste. Use the calculator to adjust this percentage depending on how complicated your ceiling is. For instance, if you have a basic square room, you’ll need less padding than an L-shaped room that has lots of angles.
Execution matters but so does planning. Making sure you know how many sheets are in your ceiling, checking where the seams should be, drawing out which row goes where all save headaches and dollars. It changes from an exercise in futility with no end in sight to something structured with a definite finish line. You pick up the board, put it down, use your screwdriver… again. And then you repeat until you’re done. You have the confidence of knowing the numbers adds up. That’s the difference between a stressful reno job and a satisfying victory on a Saturday night.