Brick Coursing Calculator
Build a course-by-course height chart, find how many courses reach a wall height, and count stretchers plus shared joints across a wall length using real brick and mortar dimensions.
🎯Brick Coursing Presets
📝Coursing Inputs
Face height of one brick, before mortar.
Length laid as a stretcher.
Bed and head joint thickness (3/8 in = 0.375).
Finished vertical height to reach.
Horizontal run for stretcher spacing.
Rows in the gauge rod chart (1 to 200).
| Course | Running Height | Alt Unit | Bed Note |
|---|---|---|---|
| Enter values to build the course chart. | |||
🔢Coursing Formula Snapshot
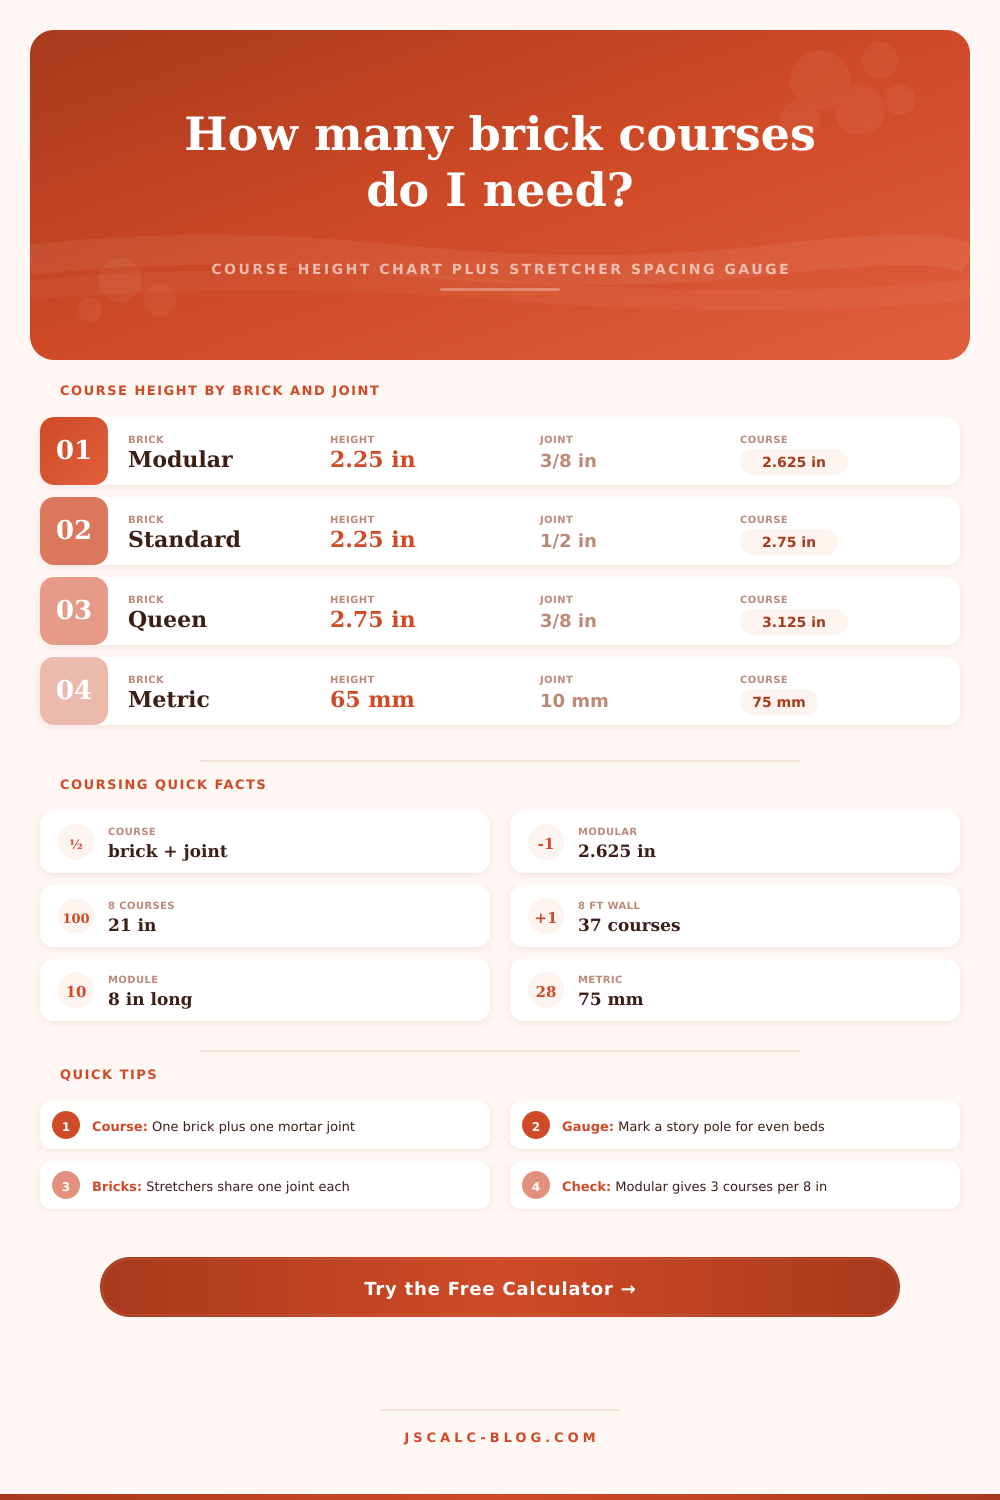
🧱Course Height by Brick and Joint
| Brick Type | Brick Height | Joint | Course Height | 3 Courses |
|---|---|---|---|---|
| Modular | 2.25 in | 3/8 in | 2.625 in | 7.875 in |
| Modular | 2.25 in | 1/2 in | 2.75 in | 8.25 in |
| Engineer modular | 2.75 in | 3/8 in | 3.125 in | 9.375 in |
| Queen | 2.75 in | 3/8 in | 3.125 in | 9.375 in |
| King | 2.625 in | 3/8 in | 3.0 in | 9.0 in |
| Utility | 3.625 in | 3/8 in | 4.0 in | 12.0 in |
| Norman | 2.25 in | 3/8 in | 2.625 in | 7.875 in |
| Metric 65 mm | 65 mm | 10 mm | 75 mm | 225 mm |
📏Running Heights, Modular 2.625 in Course
| Course | Height (in) | Course | Height (in) | Course | Height (in) |
|---|---|---|---|---|---|
| 1 | 2.625 | 8 | 21.000 | 15 | 39.375 |
| 2 | 5.250 | 9 | 23.625 | 16 | 42.000 |
| 3 | 7.875 | 10 | 26.250 | 17 | 44.625 |
| 4 | 10.500 | 11 | 28.875 | 18 | 47.250 |
| 5 | 13.125 | 12 | 31.500 | 19 | 49.875 |
| 6 | 15.750 | 13 | 34.125 | 20 | 52.500 |
| 7 | 18.375 | 14 | 36.750 | 37 | 97.125 |
🧱Stretchers per Wall Length, 8 in Module
| Wall Length | Length (in) | Bricks per Course | Head Joints | Left Over |
|---|---|---|---|---|
| 2 ft | 24 | 3.05 → 3 | 2 | 0.4 in |
| 4 ft | 48 | 6.05 → 6 | 5 | 0.4 in |
| 8 ft | 96 | 12.05 → 12 | 11 | 0.4 in |
| 10 ft | 120 | 15.05 → 15 | 14 | 0.4 in |
| 12 ft | 144 | 18.05 → 18 | 17 | 0.4 in |
| 16 ft | 192 | 24.05 → 24 | 23 | 0.4 in |
| 20 ft | 240 | 30.05 → 30 | 29 | 0.4 in |
🗂Brick Coursing Comparison Grid
| Brick Type | Nominal Size | Course Height | Courses per 8 ft | Module Length | Bricks per 10 ft |
|---|---|---|---|---|---|
| Modular | 2.25 x 7.625 | 2.625 in | 37 | 8.0 in | 15 |
| Standard 1/2 | 2.25 x 8.0 | 2.75 in | 35 | 8.5 in | 14 |
| Queen | 2.75 x 7.625 | 3.125 in | 31 | 8.0 in | 15 |
| King | 2.625 x 9.625 | 3.0 in | 32 | 10.0 in | 12 |
| Norman | 2.25 x 11.625 | 2.625 in | 37 | 12.0 in | 10 |
| Utility | 3.625 x 11.625 | 4.0 in | 24 | 12.0 in | 10 |
| Roman | 1.625 x 11.625 | 2.0 in | 48 | 12.0 in | 10 |
| Metric 65 mm | 65 x 215 mm | 75 mm | 32 | 225 mm | 13 |
⚙Full Coursing Formula Breakdown
📋Standard Gauges Reference
| Gauge Basis | Course Height | Courses | Total Height | Common Use |
|---|---|---|---|---|
| Modular 3/8 | 2.625 in | 4 | 10.5 in | Coursing to block height |
| Modular 3/8 | 2.625 in | 8 | 21.0 in | Window and sill heights |
| Modular 3/8 | 2.625 in | 37 | 97.125 in | Roughly an 8 ft wall |
| UK metric | 75 mm | 4 | 300 mm | One metric gauge unit |
| UK metric | 75 mm | 32 | 2400 mm | Standard 2.4 m storey |
| Utility | 4.0 in | 3 | 12.0 in | One foot per 3 courses |
💡Practical Coursing Tips
Remember that scene at building site when the wall appears flawless from 10 feet? But up close, its all messy joints, one brick higher then another, and whole thing lacks any sense of rhythm. Most times, it isn’t poor masonry work. Almost always, it’s bad coursing.
Because a brick wall is simply a series of course stacked on top of each other, if you do not consider the mortar joint properly from very first course, the mistake will spread by inches into every course above. Once you enter dimension of your particular brick, along with thickness of your joint, the calculator can figure out the rest. No need for you to fiddle with conversions and coefficients.
Why Course Matters in Bricklaying
Bricks is not the basic unit of masonry. The basic unit are called a course. One brick, including one layer of mortar, is a course. If you use a standard modular brick (two and a quarter inches high) with a three-eighth inch layer of mortar, each course will be two and sixty-two hundredths inches high. That’s a fraction. Those tiny fractions builds up over time.
Over the height of about a thirty-seven-course wall (about an eight-foot wall), they add up to quite a bit of vertical distance. Guessing the height, or changing mortar thickness from course to course, won’t help you match your roof beam to your window sill, or any other horizontal surface atop the wall. Instead, you’ll be cutting your bricks into oddball shapes as you attempt to match the wall to building envelope.
The biggest challenge for DIYers comes down to picking correct joint thickness: thicker looks more traditional, while being harder to maintain consistency. Half-inch joints feels substantial, but that also makes each course higher, meaning you’ll get fewer courses per height than with a tight, three-eighth inch joint. That produces a denser appearance. However, you’re going to have to lay more horizontal rows. This makes the overall brick count go up a little because you’ll end up with more courses at eight feet.
You can switch back and forth between these presets instantly on the tool, and see the effect that changing the mortar width has on your material count. It’s all laid out well on the page, with a reference table for various types of brick (including King and Queen sizes, which have slightly different nominal sizes). You can see from the table how much modular dominates residential building.
Modular bricks is built on an eight inch module. The brick plus the width of the joint will frequently fall nicely onto simple fractions, or even whole inches. This makes laying them out much easier. The system is set up to repeat in predictable ways, so you don’t have to measure each individual placement of a brick.
The reasoning is the same for laying the wall out horizontally: Each stretcher has its own head joint, but it shares this space with the stretcher next to it. By considering these shared areas, our calculator can tells you exactly how many bricks will fit in a given wall length. Want to build a ten-foot garden wall? Knowing it takes fifteen stretchers to cover that span helps you place your order with confidence and plan where to put control joints.
Why? Masonry expands and contracts with changing temperatures. No matter how careful you are when laying a continuous row of brick, you must make plans for the inévitable expansion. This planning comes physically into focus when building a gauge rod. Using the chart’s running heights as the guide, you mark down the corresponding height on an uncut piece of wood or pole. You then set your corner bricks to those marks. Next courses follow your guideline and all of your bed joints is even across the whole wall. Otherwise, you’re just making assumptions based off memory (and your tape measure), which creates cumulative errors. This tool outputs the exact same heights for as many rows as you want so you can print them out and use them as your guide during the work.
Mortar is more than glue; it’s a structural element. A well-mixed joint help distribute loads and accommodate some settlement. Too little, and you get cracks from the weight of higher up bricks. Too much, and the mortar will shrink too much during curing, causing cracks inside the joint. Achieving the right amount is partly an art, but also partly science. The inputs on the calculator makes you think through this prior to mixing your first bucket of cement and sand. You should of checked it twice.
And finally: Good masonry is precise, and it’s also patient. It’s respectful of the small units that make up the entire structure. A well-laid wall doesn’t merely stand together because of chemistry; when each joint is consistent, and each course are level, it stands together because of geometry. The result is a structure you walk away with. It looks as solid as it feels, and it is based on a simple truth: get the first few courses right and the rest will follow.