Brick Course Height Calculator
Work out vertical coursing gauge, the number of brick courses needed to reach a wall height, and the exact finished height using brick height plus the bed-joint thickness.
🧱Coursing Presets
📝Coursing Inputs
Auto-filled from the brick type. Edit for a custom height.
Standard bed joint is 10mm metric or 3/8in.
Used in target-height mode. Rounded to whole courses.
Used in course-count mode to give the exact height.
🔢Coursing Formula Snapshot
📏Standard Brick Heights
| Brick Type | Height mm | Height in | + 10mm Gauge | + 3/8in Gauge |
|---|---|---|---|---|
| UK Metric | 65 | 2.56 | 75 mm | 2.94 in |
| US Modular | 57 | 2.25 | 67 mm | 2.63 in |
| Queen | 70 | 2.75 | 80 mm | 3.13 in |
| King | 67 | 2.63 | 77 mm | 3.00 in |
| Engineering | 90 | 3.54 | 100 mm | 3.92 in |
| Roman (thin) | 41 | 1.63 | 51 mm | 2.00 in |
| Norman | 57 | 2.25 | 67 mm | 2.63 in |
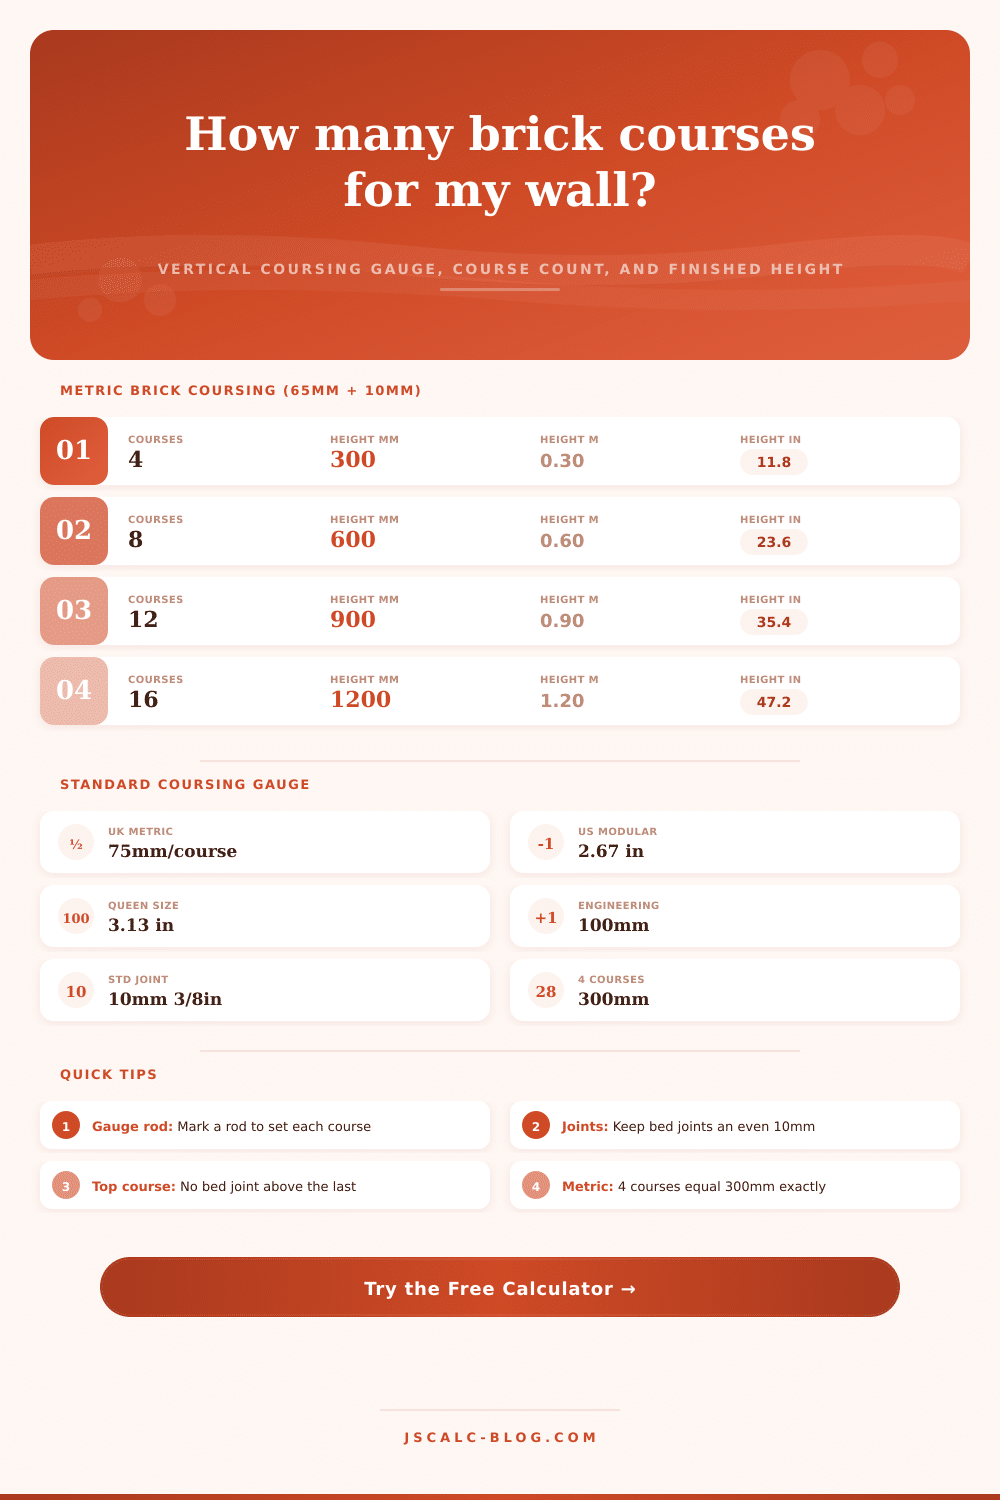
📊Metric Brick Coursing Chart (75mm Gauge)
| Courses | Height mm | Height m | Height in | Common Use |
|---|---|---|---|---|
| 1 | 75 | 0.075 | 2.95 | Single course |
| 3 | 225 | 0.225 | 8.86 | Sill upstand |
| 4 | 300 | 0.300 | 11.81 | Base metric unit |
| 8 | 600 | 0.600 | 23.62 | Low garden wall |
| 10 | 750 | 0.750 | 29.53 | Gauge rod length |
| 12 | 900 | 0.900 | 35.43 | Window sill height |
| 28 | 2100 | 2.100 | 82.68 | Door head height |
| 32 | 2400 | 2.400 | 94.49 | Standard storey |
🧮Joint Thickness Effect (UK Metric 65mm)
| Joint mm | Gauge mm | 4 Courses | 10 Courses | Courses per Metre |
|---|---|---|---|---|
| 6 (thin) | 71 | 284 mm | 710 mm | 14.1 |
| 8 | 73 | 292 mm | 730 mm | 13.7 |
| 10 (standard) | 75 | 300 mm | 750 mm | 13.3 |
| 12 | 77 | 308 mm | 770 mm | 13.0 |
| 15 (wide) | 80 | 320 mm | 800 mm | 12.5 |
| 20 (max) | 85 | 340 mm | 850 mm | 11.8 |
🗂Brick Coursing Comparison Grid
| Brick Type | Height mm | +10mm Gauge | 10-Course Height | Courses / Metre | Courses / 8ft |
|---|---|---|---|---|---|
| UK Metric | 65 | 75 mm | 750 mm | 13.3 | 32.5 |
| US Modular | 57 | 67 mm | 670 mm | 14.9 | 36.4 |
| Queen | 70 | 80 mm | 800 mm | 12.5 | 30.5 |
| King | 67 | 77 mm | 770 mm | 13.0 | 31.7 |
| Engineering | 90 | 100 mm | 1000 mm | 10.0 | 24.4 |
| Roman (thin) | 41 | 51 mm | 510 mm | 19.6 | 47.8 |
| Norman | 57 | 67 mm | 670 mm | 14.9 | 36.4 |
⚙Full Coursing Breakdown
📋Courses per Common Wall Height (Metric Brick)
| Wall Height | In mm | Courses at 75mm | Exact Fit | Finished Height |
|---|---|---|---|---|
| 0.6 m | 600 | 8 | Exact | 600 mm |
| 0.9 m | 900 | 12 | Exact | 900 mm |
| 1.2 m | 1200 | 16 | Exact | 1200 mm |
| 1.8 m | 1800 | 24 | Exact | 1800 mm |
| 2.1 m | 2100 | 28 | Exact | 2100 mm |
| 2.4 m | 2400 | 32 | Exact | 2400 mm |
| 4 ft | 1219 | 16 | Rounds down | 1200 mm |
| 8 ft | 2438 | 33 | Rounds up | 2475 mm |
💡Practical Coursing Tips
A wall that stops just shy of a window opening will trigger a bout of standing-on-scaffolding-without-a-wall-to-hold-onto panic. This typically occurs when math was done by eye rather than in exact measurement. Brickwork has a vertical rhythm. You don’t get to bend it and you certainly don’t get to pull out a mortar joint and make it stretch to the set height.
Panic averted. This tool figures out exactly how many courses tall your setup will be. The problem comes when people measure only the height of bricks without accounting for the mortar. I want to highlight that “gauge” refers to the total vertical distance between the bottoms of two adjacent brick. This is the brick height plus the thickness of the bed joint.
Why Brick Calculators Are Useful for Builders
In the UK, we use metric so a typical brick is sixty-five millimeters high. Add ten millimeters for a joint, and you’ve got a gauge of seventy-five millimeters. Ignore the joint logic, and mistake mounts up rapidly. Over thirty courses, ignoring the joint logic can throw your final height off by nearly three hundred millimeters. It’s enough to be out by an entire lintel.
Rather than having to do some mental math as you mix mortar, the calculator takes into account all of those factors and let you pick your brick type, enter in the desired height of the wall, and indicate whether you plan on doing something special with the final course. From there, it spits out total number of courses and resulting finished height. And because it knows the top brick won’t require a row of mortar above it, it’ll tell you when your wall is about to get too high for its foundation and too low for its roof, among other things.
To understand the inputs, it helps to know what those values mean. Joint thickness is measured in millimetres (10mm is standard). You can also make a thicker mortar if your substrate isn’t even. Occasionally this will affect the number of courses/meter you’ll be laying. Your total height will change as indicated by the reference tables on the page. As you increase the width of your joint, you reduce the number of courses per meter and change how everything is spaced vertically. For example, engineering bricks (which are taller) will have a much larger gauge than standard bricks and you’ll require fewer courses to get up to ceiling height.
This is something the tool accounts for automatically; you can switch from one system to another, say from imperial/US modular to metric… Without needing to pull out a different chart. The second error many builders fall into is presuming all bricks are the same height, which they most certainly aren’t. They vary regionally: In America you have a modular brick and in the UK a Norman brick. If you don’t use the right height when doing your calculations, you will order fewer bricks than needed or run out halfway up the facade.
This is where the preset buttons in the calculator come into play. They loads the most common regional dimensions into the calculator. You simply click on a dimension (imperial or metric) for the wall height or a garden wall dimension, and it automatically fills in the appropriate brick heights and joint assumptions. So no guessing about what data to start with.
And then there’s also real world aspect of coursing that no computer has solved yet. Consistency is the name of the game here and even if you’ve calculated everything correctly, you’ll need execute it in kind. Vary the width of each course a couple millimeters and you’re going to be off the mark. The bottom may look good but by the third floor up, the courses won’t line up with the structural beams. Pros use something called a gauge rod (a timber board with marks on it) to make sure they space all the layers exactly the same distance from one another. The calculator provide the math; the gauge rod provides the actual reference.
Instead of forcing bricks into a straight architectural line by cutting them all to size, stick to whole courses as a general rule of thumb for planning wall height. Cutting dozens of headers at various strange angles is far more difficult than adding a few extra inches of foundation depth or topping things off with a coping stone. With the calculator’s closest exact number in hand, you’ll match your masonry to standard construction tolerances. No more messy cuts, no more costly rework. Just an even, uniform and predictable wall with joint lines that match up.
But ultimately it’s all about power: Bricklayers has mastery over their materials. They impose order on chaos. Once they understand the scale of each brick, they can always rely on that sense of measurement. Then they pick up the trowel and know precisely where each brick goes. No more guesswork; only construction. And that confidence? That’s how you distinguish between amateurish do-it-yourself work and something pro. The numbers aren’t everything, of course, but seeing the wall come together as planned, course by course, no surprises, that’s where the gratification is.