Air Mass Calculator
Calculate optical air mass from target altitude or zenith angle, then compare secant, Kasten-Young, elevation-corrected path length, and extinction.
🎯Real presets
🧮Calculator inputs
Air mass results
📊Current comparison grid
Secant model
1.414Plane-parallel approximation. Best near the zenith and still useful through moderate zenith angles.
Kasten-Young
1.414Empirical relative optical air mass formula for z < 90°, with better behavior near the horizon.
Elevation factor
1.000Pressure ratio from observer elevation using exp(-h / 8434.5 m), applied when enabled.
Magnitude loss
0.283Estimated extinction in magnitudes from A = kX, where k is the selected atmospheric coefficient.
🧭Quick reference cards
📐Formula breakdown
Altitude to zenith angle: z = 90° - h, where h is the object's altitude above the horizon. If you enter zenith angle directly, the calculator converts back with h = 90° - z.
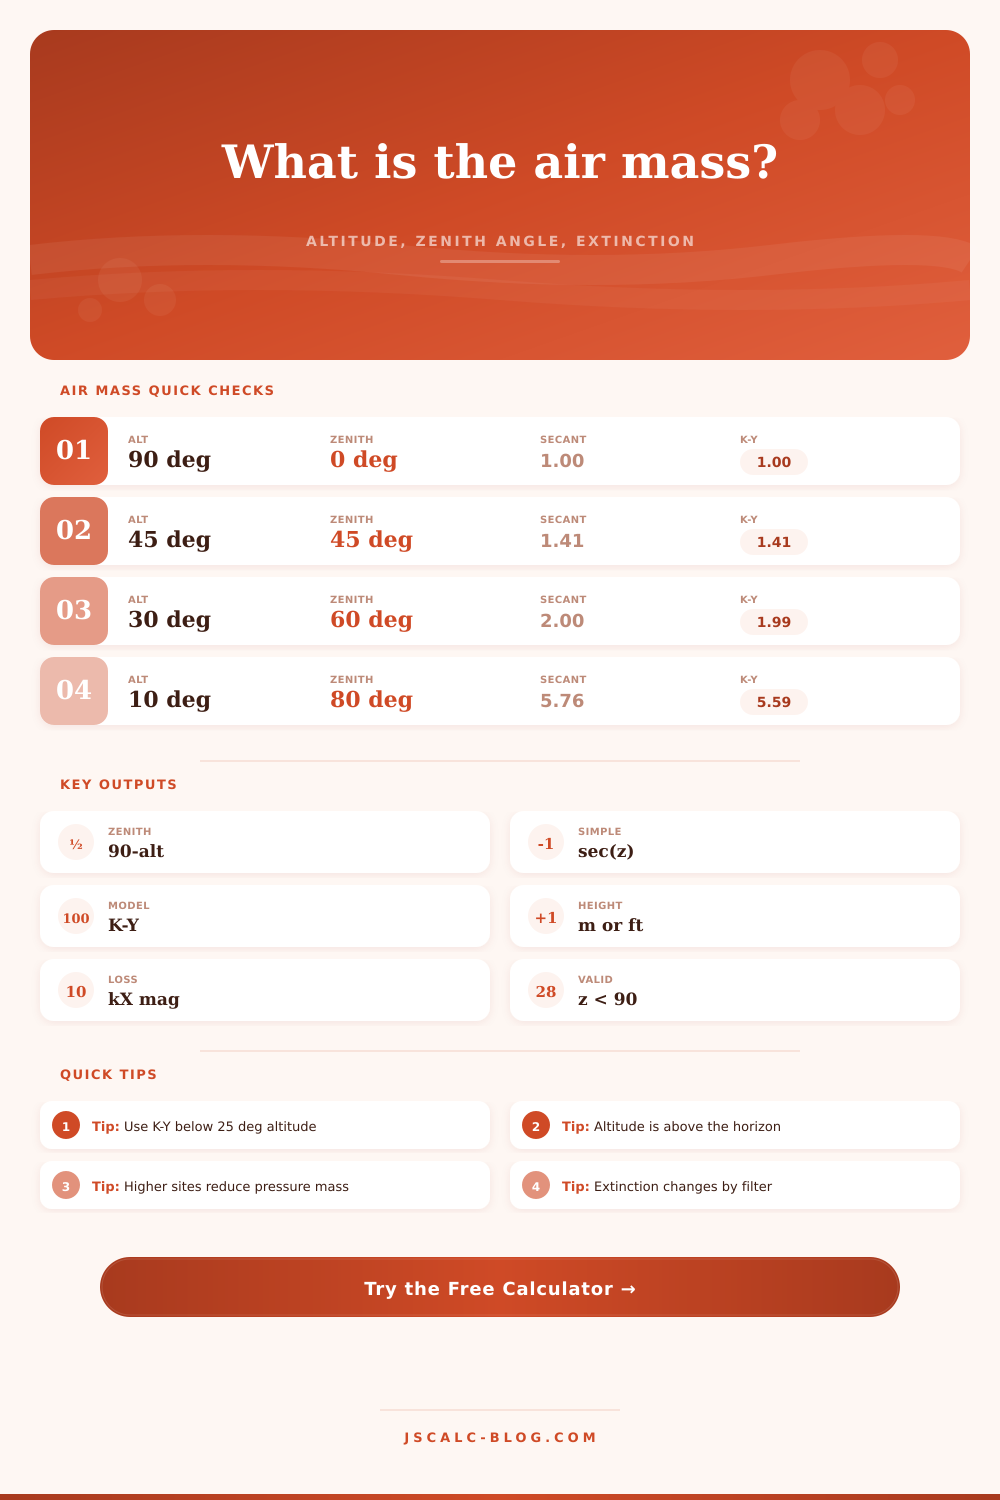
Simple air mass: X≈sec(z) = 1 / cos(z). This assumes a flat, plane-parallel atmosphere and grows too quickly very close to the horizon.
Kasten-Young air mass: Kasten-Young X = 1/(cos z + 0.50572*(96.07995-z)^-1.6364) for z<90°. This is the primary near-horizon estimate used here.
Elevation correction and extinction: elevation in feet is converted to meters with m = ft × 0.3048. Pressure factor P/P0≈exp(-elevation_m / 8434.5), corrected X = X × P/P0, and extinction A = k × corrected X. Transmission is 100 × 10^(-0.4A).
📋Air mass by sky altitude
| Object altitude | Zenith angle | Secant X | Kasten-Young X | Use note |
|---|---|---|---|---|
| 90° | 0° | 1.000 | 1.000 | Overhead reference |
| 60° | 30° | 1.155 | 1.154 | Excellent photometry height |
| 45° | 45° | 1.414 | 1.413 | Common standard-star cutoff |
| 41.8° | 48.2° | 1.500 | 1.497 | Approximate X = 1.5 |
| 30° | 60° | 2.000 | 1.994 | Useful but visibly lower sky |
| 20° | 70° | 2.924 | 2.904 | Extinction matters strongly |
| 10° | 80° | 5.759 | 5.586 | Use empirical model |
| 5° | 85° | 11.474 | 10.306 | Very high extinction |
🌈Typical extinction coefficients
| Band or condition | Typical k | Best use | At X = 1.5 | At X = 3.0 |
|---|---|---|---|---|
| Good dark site V | 0.15 mag/X | Clear visual photometry | 0.225 mag | 0.450 mag |
| Average clear V | 0.20 mag/X | General planning | 0.300 mag | 0.600 mag |
| Hazy sea-level V | 0.32 mag/X | Urban or humid nights | 0.480 mag | 0.960 mag |
| Clear blue B | 0.28 mag/X | Blue-filter work | 0.420 mag | 0.840 mag |
| Near-UV U | 0.48 mag/X | Short wavelength checks | 0.720 mag | 1.440 mag |
| Clear red R | 0.12 mag/X | Red-filter work | 0.180 mag | 0.360 mag |
| Near-IR I | 0.07 mag/X | Longer wavelengths | 0.105 mag | 0.210 mag |
| Broadband clear solar | 0.16 mag/X | Solar path estimate | 0.240 mag | 0.480 mag |
⛰Elevation conversion table
| Observer site | Elevation | Feet | Pressure factor | X correction effect |
|---|---|---|---|---|
| Sea level | 0 m | 0 ft | 1.000 | No reduction |
| Low plateau | 1000 m | 3281 ft | 0.888 | About 11% lower |
| High desert | 2000 m | 6562 ft | 0.789 | About 21% lower |
| Mountain observatory | 3000 m | 9843 ft | 0.701 | About 30% lower |
| Mauna Kea summit | 4205 m | 13796 ft | 0.607 | About 39% lower |
| Aircraft cabin example | 2400 m | 7874 ft | 0.752 | Cabin-equivalent pressure |
⚖Model comparison limits
| Method | Formula used | Strength | Caution | Best range |
|---|---|---|---|---|
| Secant | X≈1/cos(z) | Simple, transparent | Overstates near horizon | z below about 60° |
| Kasten-Young | Empirical z formula | Stable near horizon | Defined here for z < 90° | General sky planning |
| Pressure corrected | X × exp(-h/8434.5) | Includes site elevation | Approximate pressure model | Relative optical path |
| Extinction | A = kX | Connects path to dimming | k changes by night/filter | Photometry estimates |
| Transmission | 100 × 10^(-0.4A) | Shows remaining light | Not a weather forecast | Comparing scenarios |
💡Practical notes
It’s not empty space between you and the stars. It’s thick. It swirls around and distorts what you see. It blurs and bends colors depending on which way you look through it.
This thin curtain is something every amateur astronomer run up against. You point your telescope upward and aim at a dim nebula when it’s high overhead, and there she is: bright as can be. Now follow her down to where she sets, and suddenly she vanishes into the background. Why? Because there’s such a thing as air mass; the amount of atmosphere you’re piercing with your line of sight. Learn about it, and you’ll observe differently.
What Is Air Mass and Why It Matters
The term “air mass” simply describes the multiplier for thickness of the air column between us and our target. Air mass equals one if your target is right over your head. That’s the baseline.
If the target starts to move out to the horizon, the distance the light has to travel across the atmosphere greatly increase. The calculator above does this work for you, but it’s really just basic geometry mixed with atmospheric physics. Near the top, we can get away with thinking of the atmosphere as sheets of glass, each layer at right angles to the next. That’s fine, but near the horizon that doesn’t hold. Because the earth is round, those layers aren’t flat, they curve along with it. So there is the other option presented by tool: the Kasten-Young formula, which is an empirical correction for that curvature, providing you a more accurate path length for low-altitude targets.
Where you are looking isn’t the only thing you must consider: you must also factor in where you are standing. As you rise higher, pressure decreases. Having less air above cause that dimming effect; therefore, if you are observing from a mountaintop, there is less air between you and your object. The tool takes into account the inputs for elevation of observer, and it use an exponentially decaying factor according to your height. Why do observatories build atop mountains? Well, yes, to be above the clouds, but more importantly, to thin out the atmospheric wedge. At twenty degrees altitude, a target with an air mass of three at sea level could be an air mass of two point four at two thousand meters. That can make the difference between a successful exposure and one that fails.
And what’s the price? You’re paying for that extra path length with extinction. Extinction is measured in magnitudes per air mass. Why does the sun go orange at sunset? Because the atmosphere scatters blue light more than it do red. For visual light, a clear night from a dark site might have an extinction coefficient of zero point one five. If you’re in a city and experiencing haze, it could be as high as zero point three two.
That’s where the calculator comes in: you pick a preset for whichever condition applies, and it multiplies that by your corrected air mass to estimate the magnitude of brightness loss. Then it calculates that number into the percentage of transmitted light. At low altitudes, you’ll see that only sixty percent of your light makes it through the atmosphere. This is a serious reminder of why we like our targets near the meridian.
People make common errors when they ignore the horizon effects. At moderate angles, the secant estimate overestimates air mass a little bit; but right near the horizon it wildly overestimates the path length. That’s where the Kasten-Young formula comes into play and is more stable. But nobody built a calculator that predicts the local weather. You might have a front coming through, which means that your actual extinction will be higher than what the preset says. The tool spits out a deterministic estimate using standard atmospheric models. Turbulence from a warm night? Dust in the air? Not factored in. It’s the theoretical best case for a given geometry. So plan accordingly with that knowledge.
When the things you want to see are up in the sky, go out and do your deep-sky imaging. When they’re down low, take some time to observe the brighter planets, because they’ll be okay as they get dimmer. If you’re making plans or comparing locations to visit a higher spot above sea level, put in the elevation so it knows where you’re located.
The chart on that page spells out the tradeoffs nicely. And it shows you just how fast the air mass increase as altitude drops. That’s where the key lies, understanding exactly what you’re looking at. What you’re really seeing is how dense the material is from your target object all the way back to your lens. Once you get your head around that, the numbers becomes less abstract and more like a guide for what you can accomplish on your stargazing nights.
The sky holds plenty of light, but it also holds plenty of impediments to seeing it. Understanding how thick those impediments are will let you pierce through to see farther into the night.