Video Bitrate Calculator
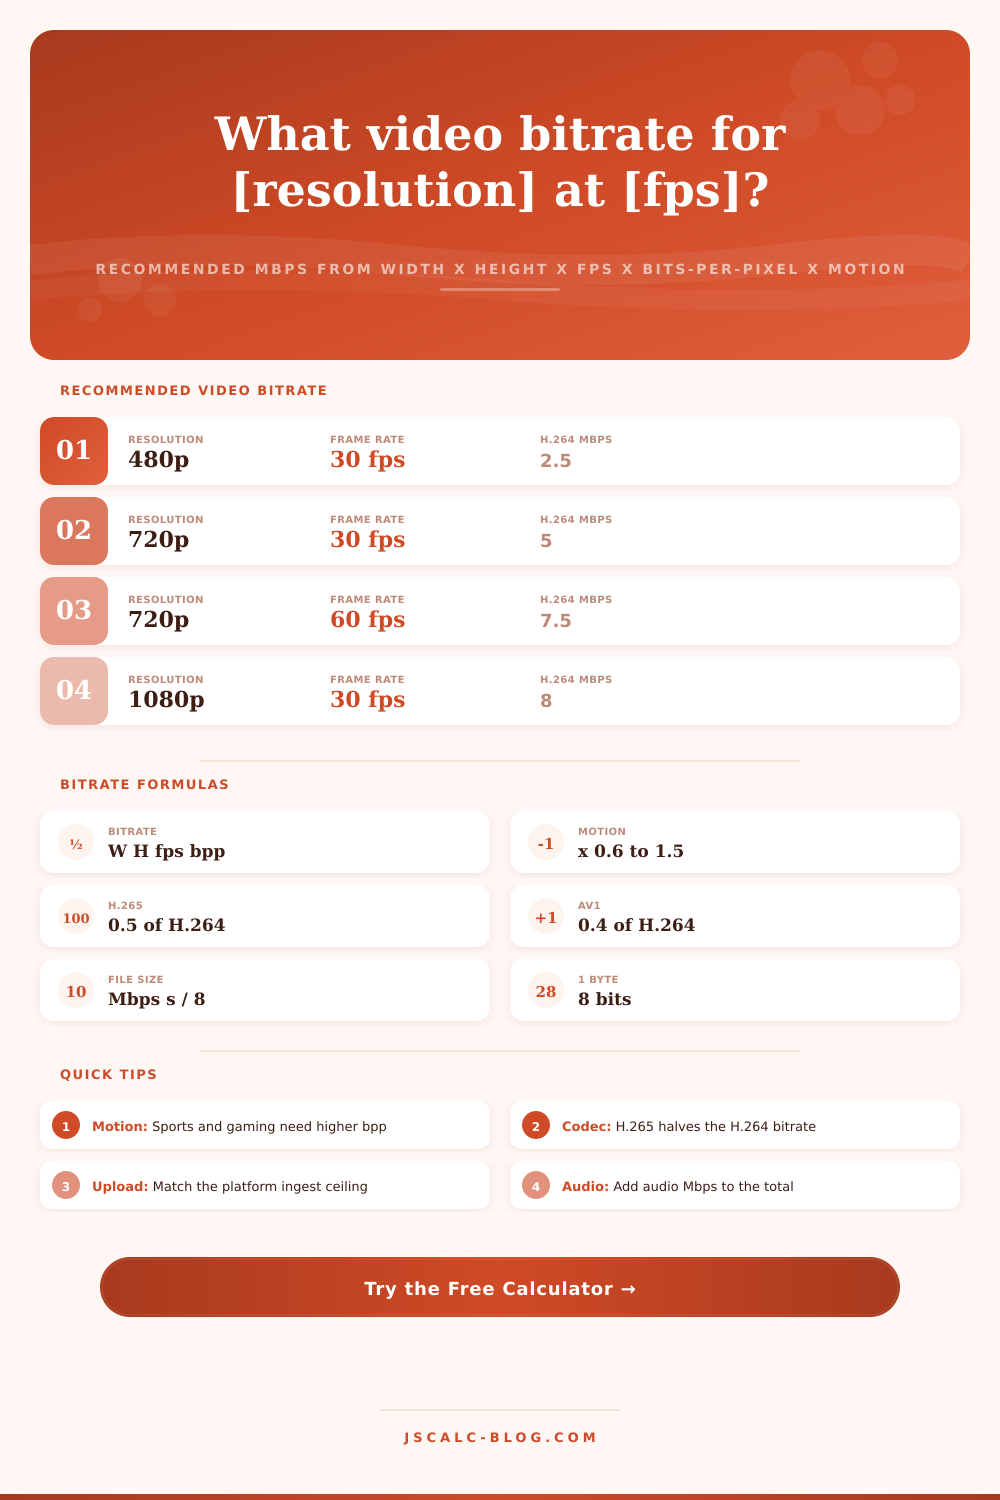
Find the recommended video bitrate in Mbps from your resolution, frame rate, codec, and motion level. The tool multiplies width by height by frames per second by a bits-per-pixel target, applies a codec efficiency factor, then returns a safe min-max range, the bits-per-pixel actually achieved, and the resulting file size for any clip length.
🎬Choose a Mode
🎯Real Encoding Presets
🖥Video Inputs
Pick a standard frame size or choose Custom below.
More frames per second need proportionally more bitrate.
Horizontal pixel count when Resolution is Custom.
Vertical pixel count when Resolution is Custom.
Efficiency vs H.264. Lower factor means less bitrate for the same look.
Busier footage needs a higher motion factor.
Base bits per pixel before codec and motion adjustments.
Sets the base bpp yourself; motion and codec still apply.
Used only for the estimated file size card. Set 0 to skip.
Added to video for total stream bitrate and file size.
🔢Formula Snapshot
📺Recommended H.264 Bitrate by Resolution
| Resolution | Frames Per Second | Typical H.264 Mbps | Best For |
|---|---|---|---|
| 480p SD | 30 fps | 2 to 3 Mbps | Webcam, low data |
| 720p HD | 30 fps | 4 to 5 Mbps | Basic streaming |
| 720p HD | 60 fps | 6 to 8 Mbps | Casual gaming |
| 1080p Full HD | 30 fps | 8 to 10 Mbps | Standard uploads |
| 1080p Full HD | 60 fps | 12 to 15 Mbps | Sports, gaming |
| 1440p QHD | 60 fps | 24 to 30 Mbps | Crisp PC capture |
| 4K UHD | 30 fps | 35 to 45 Mbps | Detailed footage |
| 4K UHD | 60 fps | 53 to 68 Mbps | High-motion 4K |
| 8K UHD | 30 fps | 100 to 130 Mbps | Pro mastering |
⚙Codec Efficiency Comparison
| Codec | Factor vs H.264 | Same Look As 10 Mbps H.264 | Encode Speed | Support |
|---|---|---|---|---|
| H.264 / AVC | 1.0 | 10 Mbps | Very fast | Universal |
| H.265 / HEVC | 0.5 | 5 Mbps | Slower | Wide |
| VP9 | 0.55 | 5.5 Mbps | Slow | Web / Google |
| AV1 | 0.4 | 4 Mbps | Very slow | Growing |
📈Resolution Pixel Counts
| Name | Width x Height | Total Pixels | Relative to 1080p |
|---|---|---|---|
| 480p SD | 854 x 480 | 409,920 | 0.20x |
| 720p HD | 1280 x 720 | 921,600 | 0.44x |
| 1080p Full HD | 1920 x 1080 | 2,073,600 | 1.00x |
| 1440p QHD | 2560 x 1440 | 3,686,400 | 1.78x |
| 4K UHD | 3840 x 2160 | 8,294,400 | 4.00x |
| 8K UHD | 7680 x 4320 | 33,177,600 | 16.0x |
🗃Streaming vs Archival Quality Grid
| Resolution | Frame Rate | Motion | H.264 Mbps | H.265 Mbps | Typical Use Case |
|---|---|---|---|---|---|
| 480p | 30 fps | Low | 1.5 | 0.8 | Voice call archive |
| 720p | 30 fps | Medium | 4.6 | 2.3 | Tutorial stream |
| 720p | 60 fps | High | 12 | 6 | Mobile gaming |
| 1080p | 30 fps | Medium | 10.4 | 5.2 | Vlog upload |
| 1080p | 60 fps | High | 27 | 13.5 | Live sports |
| 1440p | 60 fps | High | 48 | 24 | Esports capture |
| 4K | 30 fps | Medium | 41 | 20.7 | Cinematic edit |
| 4K | 60 fps | High | 108 | 54 | Master archive |
| 8K | 30 fps | Medium | 166 | 83 | Studio mastering |
🛠Formula Breakdown
💡Bitrate Planning Tips
By now, you’ve likely uploaded some video, then gazed dumbfounded at fuzzy image wondering what happened because you chose max resolution. Here’s the secret: Resolution isn’t usually the issue. What destroys your pixels is bitrate… How much data gets allocated per second of content.
While bitrate is video’s greatest tool for improving quality, it’s also its most confused. Too little and your video becomes a mosaic of colorful squares. Too much and you’re wasting upload bandwidth (and storage) without getting any clearer. So how do you set the right bitrate?
How Bitrate Works
Enter the calculator above and plug in your resolution, frame rate, codec, and level of motion. This bypasses guesswork of conversions and coefficients. You will get an answer you can defend while saving yourself time doing math.
But the underlying math is not too complex. Pixels is laid out on a grid, one pixel per square on a frame. Each pixel use a fraction of a bit when encoded, depending on quality. The number of pixels times the number of frames equals pixels per second; multiply that by your target bits per pixel and that’s your baseline. With a rough idea of how good an image you want, you have some starting point for encoding rate.
Two million pixels is roughly what a 1080p frame has. Thirty frames per second. Modest quality setting. Do the math: That’s your baseline bits before any tinkering. Not much, but important: it anchors the estimate in something real instead of some made-up platform suggestion. And indeed, there’s that base calculation hiding behind the bits-per-pixel output, it’s like a sanity check of what you’re doing with your encoding.
The missing piece for many is that motion matter a lot. Different scenes require wildly different bitrates at 1080p resolution. Compression only saves differences in the image. Because a talking-head shot has minimal movement, there are hardly any differences from one frame to the next, so it requires very little bandwidth. Grainy night scenes or really fast action (like sports) change nearly all pixels on every frame, making that trick completely ineffective. That’s why there’s a motion factor in the tool, it bumps the bitrate higher for active footage. Visible blocking shows up when you don’t provide enough bitrate on high-motion stuff, and that’s far more important than choosing the resolution in the first place.
This is where the codec comes in. H.264 is the base; everyone plays it back, but there are new codecs with much higher efficiencies. These can fits the same quality video into much smaller files. For example, H.265 can reach the same quality at roughly half the bitrate, while AV1 needs only about forty percent of what H.264 requires. The calculator uses these efficiency numbers. This means you can greatly reduce your file size without losing any detail simply by updating your codec.
Of course, there’s a catch: you need hardware support and it takes more encoding time. On the one hand, AV1 will save you space on your hard drive, though it take longer to encode. You’re saving either your hard drive space or your CPU cycles.
These are the four key numbers in the results panel. You’ll see one of these as the adjusted recommended bitrate… This is your single target after adjustments. Then there’s the range, which is a reasonable band around the bitrate where you might want to choose a bigger file for more safety margin. This gives you more safety margin. There’s the estimated file size so you can plan storage space, and then there are the achieved bits per pixel which show density the encoder was aiming for. For most streaming content this will be somewhere between zero-point-zero-two and zero-point-fifteen bits per pixel. Anything much above or below that means you’re wasting data or potentially compromising on quality.
Each destination has its own expectations. Some (like live platforms) will top out the stream. Anything beyond that amount just causes them to buffer. Others (on-demand services) re-encode what you upload; give ’em a nice clean master and they’ll preserve as much detail during their pass. This page’s reference table provides a sense of typical input requirements across resolutions and frame rates, so you can easily see if your calculation lines up with others’ experience.
When you know the target, how do you apply it? If your encoder uses constant bitrate, then keep it fixed, this makes the stream predictable. If your encoder is variable bitrate, it will use more where it needs it and less where it doesn’t, generally looking better while using same average file size. The same trade-off occurs for streamers sizing their uploads, editors creating a master, or students studying compression.
This calculator combines those factors; plus codec and motion, with the bits-per-pixel approach so a guess becomes a defensible figure. Begin with a preset that reflects your intent, tweak the variables based on your footage, and immediately see the suggested bitrate adjusted. Knowing precisely what to feed the encoder is always better than hoping it guessed right. That insight is the difference between a crisp picture and a muddy mess.
You should of used more bits to avoid this moddern mess.