Multi-Monitor Bezel Correction Calculator
Work out the hidden pixels that vanish behind every seam of a Surround or Eyefinity array, the exact PPI of one panel, and the full bezel-corrected canvas resolution. Bezel correction inserts phantom pixels across each gap so a straight line stays straight as it crosses from one screen to the next.
🎯Popular Surround Presets
📝Array and Panel Inputs
Count of panels side by side in one horizontal Surround span.
Portrait swaps width and height of each panel.
Pixels across one panel in its native landscape mode.
Pixels down one panel in its native landscape mode.
Advertised diagonal of the visible panel, used for PPI.
Two panels meeting create a combined gap of both bezels.
One side of one panel; the seam uses two of these.
Ruler distance between the two active image edges.
Drivers insert whole phantom pixels; decimals show precision.
🔢Formula Snapshot
📋Single-Panel PPI Reference
| Panel | Resolution | Diagonal | PPI | 1 mm in Pixels |
|---|---|---|---|---|
| 1080p 24 in | 1920 x 1080 | 24 in | 92 PPI | 3.6 px |
| 1080p 22 in | 1920 x 1080 | 22 in | 100 PPI | 3.9 px |
| 1080p 27 in | 1920 x 1080 | 27 in | 82 PPI | 3.2 px |
| 1440p 27 in | 2560 x 1440 | 27 in | 109 PPI | 4.3 px |
| 1440p 32 in | 2560 x 1440 | 32 in | 92 PPI | 3.6 px |
| 4K 28 in | 3840 x 2160 | 28 in | 157 PPI | 6.2 px |
| 4K 32 in | 3840 x 2160 | 32 in | 138 PPI | 5.4 px |
| Ultrawide 34 in | 3440 x 1440 | 34 in | 110 PPI | 4.3 px |
📏Bezel Class and Hidden Pixels
| Bezel Class | Single Side | Combined Gap | At 92 PPI | At 109 PPI |
|---|---|---|---|---|
| Ultra thin frameless | 4 mm | 8 mm | 29 px | 34 px |
| Thin gaming | 6 mm | 12 mm | 43 px | 52 px |
| Standard slim | 8 mm | 16 mm | 58 px | 69 px |
| Typical office | 10 mm | 20 mm | 72 px | 86 px |
| Thick older panel | 15 mm | 30 mm | 109 px | 129 px |
| Chunky legacy | 20 mm | 40 mm | 145 px | 172 px |
| VESA mount gap add | 2 mm | 4 mm | 14 px | 17 px |
🗃Surround Setup Comparison Grid
| Setup | Monitors | Native W | Seams | Hidden px/Seam | Corrected W |
|---|---|---|---|---|---|
| Triple 1080p thin | 3 | 5760 | 2 | 29 | 5818 |
| Triple 1080p office | 3 | 5760 | 2 | 72 | 5904 |
| Triple 1440p 27 in | 3 | 7680 | 2 | 86 | 7852 |
| Dual 1080p | 2 | 3840 | 1 | 72 | 3912 |
| Triple 4K 28 in | 3 | 11520 | 2 | 124 | 11768 |
| 5x1 racing sim | 5 | 9600 | 4 | 72 | 9888 |
| Portrait triple 24 in | 3 | 3240 | 2 | 72 | 3384 |
| Triple ultrawide 34 in | 3 | 10320 | 2 | 86 | 10492 |
| Flight sim 3x 32 in QHD | 3 | 7680 | 2 | 72 | 7824 |
| Budget 3x 22 in | 3 | 5760 | 2 | 78 | 5916 |
🔧Length and Pixel Conversions
| Unit | Equals | In Millimeters | Note |
|---|---|---|---|
| 1 inch | 25.4 mm | 25.4 mm | PPI conversion base |
| 1 cm | 10 mm | 10 mm | Bezel often quoted in cm |
| 1 mm | 0.0394 in | 1 mm | Thin bezel unit |
| 1 px at 92 PPI | 0.276 mm | 0.276 mm | 24 in 1080p pixel pitch |
| 1 px at 109 PPI | 0.233 mm | 0.233 mm | 27 in 1440p pixel pitch |
| 1 px at 157 PPI | 0.162 mm | 0.162 mm | 28 in 4K pixel pitch |
⚙Formula Breakdown
💡Bezel Correction Tips
For anyone who has built out a surround (Eyefinity) setup, at some point they hit the limitation of bezel. The plastic that separates your monitor displays and eats some fraction of the image. If you stretch one image over multiple display, the pixels that ought to reside beyond the bezel just aren’t rendered… Hence why something like a horizon line or a straight road will jump left/right when it reaches the next display.
That’s where Bezels come in; they render those invisible pixels, as if they were actualy there, making the visible parts align perfectly again. The result is something called a ‘corrected canvas’; with a different total resolution than the raw input. That’s where this calculator comes into play, exactly calculating how many hidden pixel each seam requires and reporting back on corrected canvas size.
How to Fix Monitor Bezel Issues
When you have one monitor you’re seeing a single picture continuously; when you have a row of monitors you’ve got a row of picture frames with dead zones in-between. Tile a 1080p image across three monitors straight across without any correction. While every pixel gets drawn, the actual frame encompasses the join. What this means is things will seem to shift a few centimetres and teleport across the seam.
By skipping the pixels behind the gaps (a process called bezel correction), your eye sees an unbroken scene that is interrupted only by a series of very thin black bars. It’s a lot closer to looking out of a divided window than it is a succession of individual pictures, which is why sims feels immersive rather than fragmented.
Pixel density is measured in pixels per inch (PPI). This is where it all begins; everything follows from pixel density. The calculator above only does one thing: simply input your panel size in pixels and inches, and it calculates pixel density by dividing the diagonal pixels by the diagonal inches. For example, a 24 inch monitor with a 1920 by 1080 panel has roughly 92 pixels per inch.
Why? Because PPI is the bridge between the millimeters of a bezel and the pixels of a frame buffer, so while other aspects of your setup may not depend on having an exact diagonal and native resolution, it matters most here. Get your PPI wrong, and every other calculation regarding hidden pixels will also be wrong. PPI, the pixels in the frame buffer, is the bridge between the pixels in your bezel and the millimeters in your bezel. This means that while other aspects of your setup may not depend on having an exact diagonal and native resolution, it matters most here. Get your PPI wrong, and every other calculation regarding hidden pixels will also be wrong.
The biggie: People measure only one bezel and then call it a day. Remember, two panels is touching at each joint, which means the gap is the sum of their respective left/right bezels. So if a monitor has been listed as having a 10 mm bezel, it’s going to have a cumulative 20 mm gap where it touches a twin. The chart in the reference table on this page makes this clear for all classes of panel.
This mode also allows you to switch to measured mode and read a ruler straight across from one live image to another; again capturing any air gap caused by mounting hardware. Because spec sheets may not account for that air space, it’s better to measure the real thing edge-to-edge. With that one line, the PPI of your panels, and their combined seam gap in millimeters, we know how many hidden pixels there are.
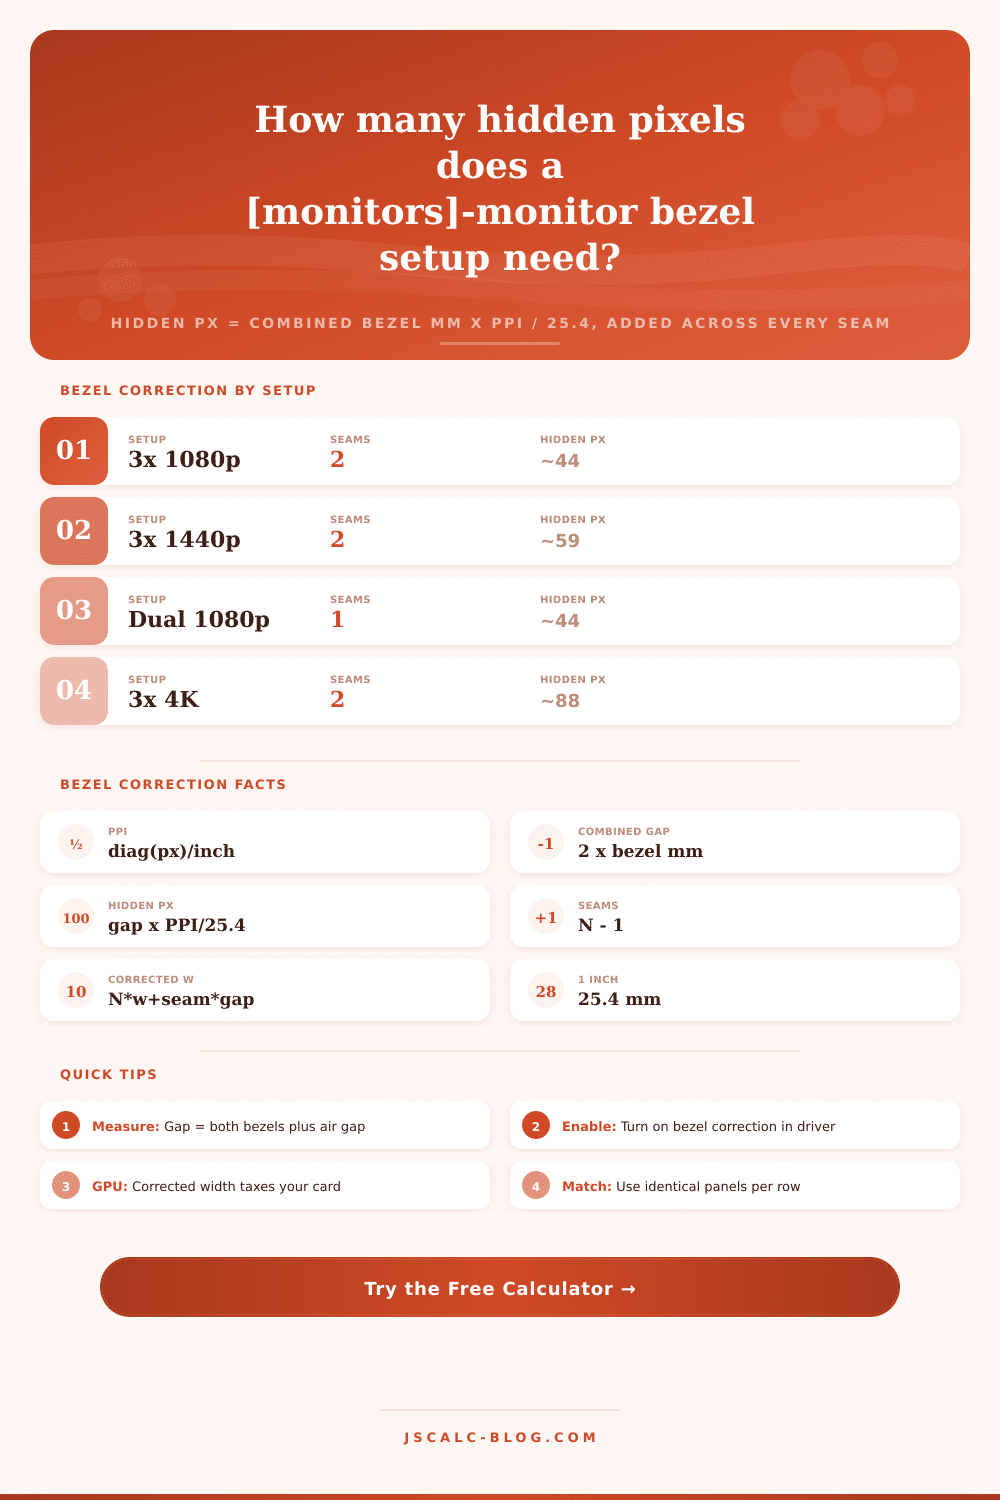
Just divide the gap in millimeters by 25.4 (since there are 25.4 millimeters in an inch) and then multiply by the PPI. If your gap is 20 mm and your PPI is 92, there are roughly 72 pixels being hid. That’s the number of phantom pixels the display has to add at every seam.
A chunky older bezel might hide more than a hundred; thinner frameless ones with an 8 mm combined gap hide around 29. It sounds like nothing, but it adds up when calculating the final width of a resolution. There are N-1 seams in a horizontal row of N monitors: one between each adjacent pair. The bezel-corrected monitor width is calculated as N times the native horizontal resolution plus the number of seams times the hidden pixels per seam.
Take three 1080p panels. That’s three times 1920 + two times 72, or 5760 + 144 = corrected width of 5904 pixels. Height remains same as a single panel. Feed that corrected resolution into your driver or game. Then Surround and Eyefinity will see an odd width slightly bigger than a clean multiple of panel resolution.
Rotating panels to portrait switches their width and height, changing the geometry. It’s a common configuration for flight and racing simulators that wrap the vertical field of view around the driver without making the horizontal seams wide. In that case, the calculator just swaps the resolution values before arranging them. Large arrays also has more seams, so those seams scale as well. A five-monitor sim has four seams. This means its hidden pixels add up four times over and the correct width climbs to match.
That’s not free, and the next section explains the practical catch. The graphics card turns every one of those phantoms into an actual pixel. And yes, widening or heightening the array pushes that number farther, for example, turning on bezel correction on three 1080p panels raises the width from 5760 to something like 5904, which is around a two and a half percent increase in pixels per frame. Make sure your card has some frame-rate headroom before you turn it on.
On the bench, don’t trust a spec sheet; find out the true gap between edges by measuring edge to edge. Line up matching panels within a given row so that their seams are consistent. Keep in mind that thinner bezels look cleaner, but they also conceal fewer pixels. This makes it easier on both the eye and the rendering load. As it should of, the straight line’s back.