DPI to PPI Converter
Convert between the three print and display density units - DPI (printer ink dots per inch), PPI (image pixels per inch) and LPI (halftone lines per inch). Apply the Quality Factor with PPI = LPI x QF and the halftone cell with DPI = LPI x cell to find the exact resolution you need at the press or on screen.
🖼Choose a Conversion
🎯Real Print and Screen Presets
📝Conversion Inputs
Uses the Quality Factor: PPI = LPI x QF.
Uses the halftone cell: DPI = LPI x cell size.
Halftone frequency of the press or plate.
Sampling of the digital image at print size.
Addressable ink or laser dots of the device.
2.0 is the classic 2x ruling rule of thumb.
Cell side = sqrt(levels); DPI = LPI x cell side.
Pixel count on the side you are printing.
Final printed length of that same edge.
1 inch = 2.54 cm for the size above.
Applies to every result card and breakdown.
🔢Formula Snapshot
📚DPI vs PPI vs LPI - What Each Unit Means
| Unit | Stands For | Measures | Where It Lives |
|---|---|---|---|
| PPI | Pixels Per Inch | Image / display sampling | Digital files and screens |
| DPI | Dots Per Inch | Printer ink or toner dots | Inkjet and laser hardware |
| LPI | Lines Per Inch | Halftone screen frequency | Offset plates and presses |
| SPI | Samples Per Inch | Scanner capture rate | Flatbed and drum scanners |
| PPCM | Pixels Per cm | Metric pixel density | ISO specs, EU displays |
| DPCM | Dots Per cm | Metric dot density | Metric printer sheets |
📊LPI to Required PPI (Quality Factor)
| Screen Ruling LPI | PPI at QF 1.5 | PPI at QF 2.0 | Typical Use |
|---|---|---|---|
| 65 lpi | 98 ppi | 130 ppi | Coarse newsprint |
| 85 lpi | 128 ppi | 170 ppi | Newspaper photos |
| 100 lpi | 150 ppi | 200 ppi | Uncoated stock |
| 120 lpi | 180 ppi | 240 ppi | Quick print, flyers |
| 133 lpi | 200 ppi | 266 ppi | General commercial |
| 150 lpi | 225 ppi | 300 ppi | Magazines, brochures |
| 175 lpi | 263 ppi | 350 ppi | Art books, coated |
| 200 lpi | 300 ppi | 400 ppi | Fine art, premium |
🧭Common Print LPI Standards
| Output Type | Screen Ruling | Paper Stock | Best PPI (QF 2) | Notes |
|---|---|---|---|---|
| Screen print / billboard | 25 - 45 lpi | Vinyl, mesh | 50 - 90 ppi | Viewed from far away |
| Newspaper | 75 - 100 lpi | Newsprint | 150 - 200 ppi | High ink absorption |
| Newsletter / flyer | 100 - 133 lpi | Uncoated | 200 - 266 ppi | Office and quick print |
| Magazine | 133 - 150 lpi | Coated gloss | 266 - 300 ppi | Sheetfed and web offset |
| Brochure / catalog | 150 - 175 lpi | Coated matte | 300 - 350 ppi | Premium commercial |
| Art / photo book | 175 - 200 lpi | High-gloss art | 350 - 400 ppi | Stochastic often used |
| Fine art proof | 200 - 300 lpi | Coated premium | 400 - 600 ppi | Very close viewing |
🖨Printer DPI Classes and LPI Support
| Device Class | Native DPI | LPI at 256 Shades | Notes |
|---|---|---|---|
| Office laser | 600 dpi | ~37 lpi | Text sharp, coarse halftone |
| High-res laser | 1200 dpi | ~75 lpi | Newsletters, light photos |
| Desktop inkjet | 1440 dpi | ~90 lpi | Uses dithering, not true LPI |
| Photo inkjet | 2880 dpi | ~180 lpi | Fine droplets, error diffusion |
| Imagesetter | 2400 dpi | 150 lpi | Film and plate output |
| Platesetter | 3600 dpi | ~225 lpi | Direct-to-plate CTP |
| High-end CTP | 4800 dpi | ~300 lpi | Fine art and security print |
🗃Unit Conversion Comparison Grid
| Scenario | LPI | QF | Needed PPI | Cell (levels) | Printer DPI |
|---|---|---|---|---|---|
| Coarse newsprint | 65 | 2.0 | 130 ppi | 16 (256) | 1040 dpi |
| Newspaper photo | 85 | 2.0 | 170 ppi | 16 (256) | 1360 dpi |
| Uncoated flyer | 100 | 1.5 | 150 ppi | 8 (64) | 800 dpi |
| Commercial job | 133 | 2.0 | 266 ppi | 16 (256) | 2128 dpi |
| Magazine gloss | 150 | 2.0 | 300 ppi | 16 (256) | 2400 dpi |
| Brochure matte | 150 | 1.5 | 225 ppi | 8 (64) | 1200 dpi |
| Art book coated | 175 | 2.0 | 350 ppi | 16 (256) | 2800 dpi |
| Fine art premium | 200 | 2.0 | 400 ppi | 16 (256) | 3200 dpi |
| Security proof | 250 | 2.0 | 500 ppi | 16 (256) | 4000 dpi |
| Billboard far view | 30 | 1.5 | 45 ppi | 4 (16) | 120 dpi |
⚙Formula Breakdown
💡Resolution Setup Tips
This is where we often get confused about the measurements. When your design file prints out looking pixelated or soft it’s typically because you’ve mixed up LPI, DPI and PPI. Even though they measure different things in different places (despite all measuring density), these measurements is used at different stages of the process so it’s easy to see why people make mistakes when treating them interchangeably.
To properly calculate these numbers, all three need to be linked together.
Understanding LPI, DPI, and PPI
This refers to your digital image file. How densely does the picture sample? It’s called pixels per inch (PPI). A high resolution photograph have lots of PPI.
This is what printer or plotter has. This is called dots per inch (DPI). These are dot that get laid down on paper using toner or ink.
This belongs to halftone screen used in offset printing. This is called lines per inch (LPI), and it’s what makes up the halftone screen. The halftone screen break the image up into groups of dot and creates a simulated tone through a grid-like effect.
The DPI will always be greater than the LPI because one shade of gray necessitates lots of dots within a given halftone cell. Between two lies the PPI. Knowing this hierarchy will help you create files. Your image must be sent to the printing plate. The Quality Factor is bridge between your PPI and LPI.
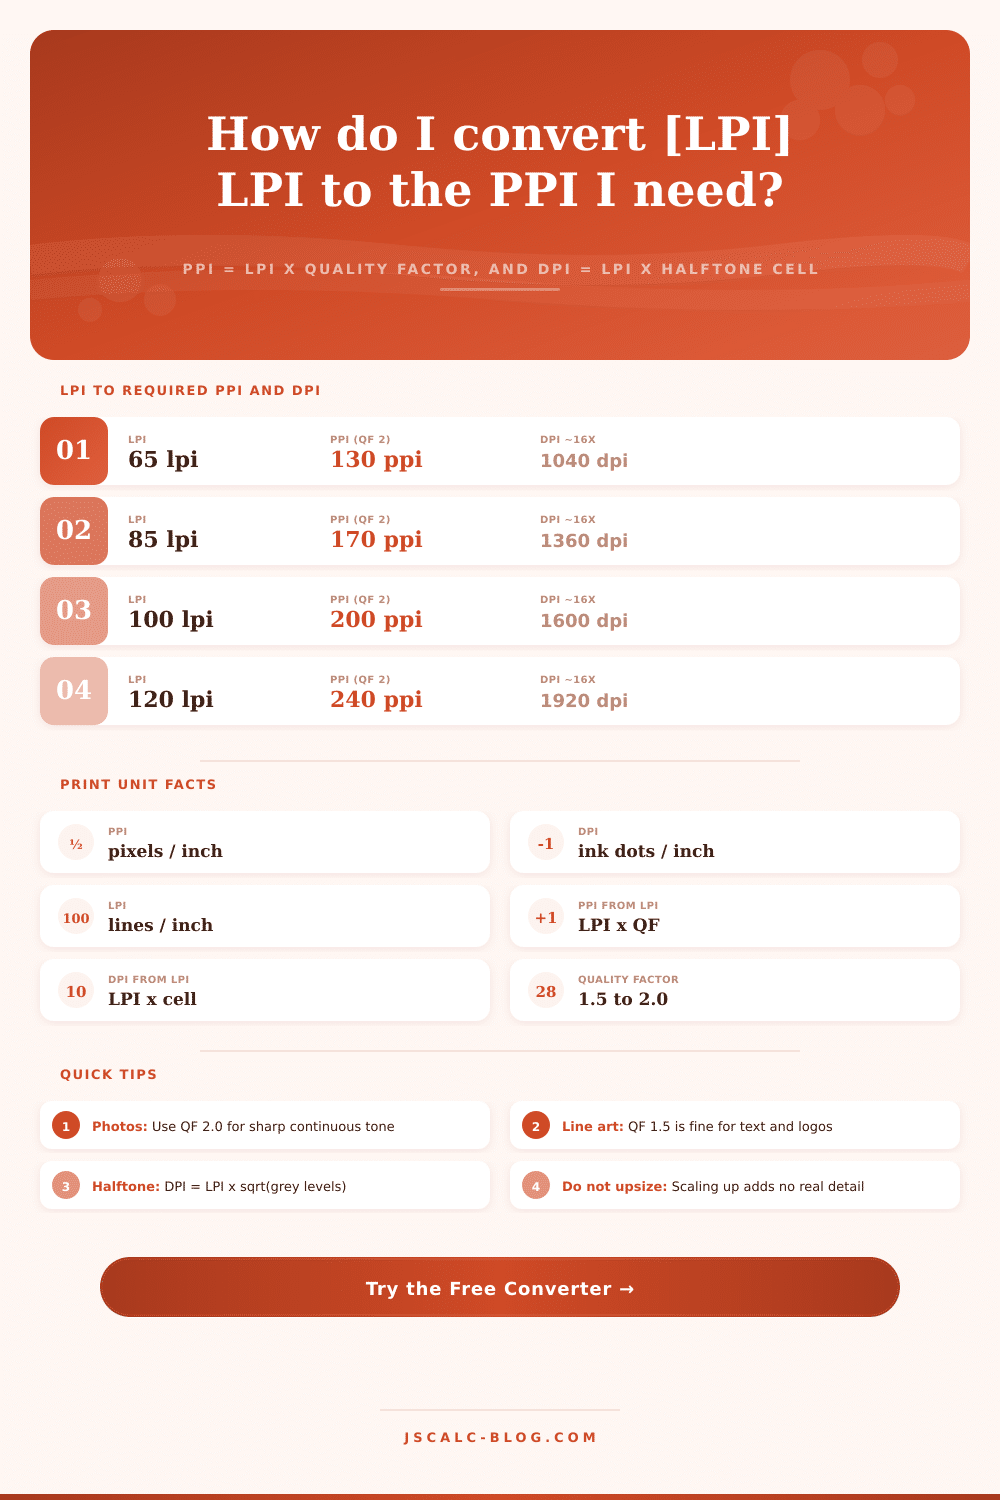
Here’s how it works: “PPI = LPI x Quality Factor Here’s how it works: “PPI = LPI x Quality Factor” For example, the Quality Factor is typically between 1.5 and 2.0; 2.0 is standard when printing a sharp photo. In that case, if a magazine prints at 150 LPI, your file need to have 300 PPI. A Quality Factor of 1.5 would require 225 PPI, suitable for text-heavy brochures, though portrait details might appear softer.
The tool will calculate back-and-forth. So you can either input your file specs to determine what ruling it supports or enter the screen ruling and see what kind of image resolution are needed.
The second half of equation links the halftone screen to the printer itself. The other half of the equation connect the halftone screen to the physical printer hardware via the halftone cell, because each square cell in the screen grid must contain enough printer dots to build every shade of gray you want. If the size of the square (the side length) is measured in dots, then number of shades is equal to the square of that side length. In the case of standard 256 levels of gray, the cell contains sixteen dots across and down.
One cell equals one line of screen. The device’s resolution, or DPI, are equal to the LPI multiplied by the side of the cell. At full quality, the job requires 2400 DPI from the imagesetter to achieve a 150 LPI job. That’s why pros have their platesetters running so fast.
Without any banding, low DPI (as with a laser printer) can’t accommodate high screen rulings. The other factor is file size vs. Print size. Stretching those pixels across more inches reduce their PPI. For example, printing an image with an edge of 3000 pixels at ten inches result in 300 PPI. Print it at fifteen inches and it’s reduced to 200 PPI. That impacts the screen ruling you can safely use.
The calculator will do this math for you. Before you begin printing, it presents you with trade-off between sharpness and size.
Folks mistake higher image PPI for higher DPI of their devices. Having a 4800 DPI printer doesn’t imply you should of had a 4800 PPI image. You don’t need more than 300 PPI (image) for a 150 LPI (printer). Image detail isn’t what the extra device resolution create; that’s the halftone dots. If you upscale a small file to match an arbitrary number, you’re inventing pixels where no information exists. Better: get good source material to begin with and let the math go from there. Keep these units clearly separate so your files print crisply.